The Maze in Canyonlands: 4-Day Itinerary and What It’s Really Like
Driving the Maze in Canyonlands was one of the most remote trips I’ve ever done. With rough 4WD roads, no services, and hours between campsites, this isn’t your typical national park experience.
While Canyonlands National Park sees between 600,000 and 800,000 visitors each year, fewer than 1% make it to the Maze District.
The biggest barrier? Access. You’ll need a high-clearance 4WD vehicle, off-road driving experience, and a willingness to spend hours navigating rugged terrain.
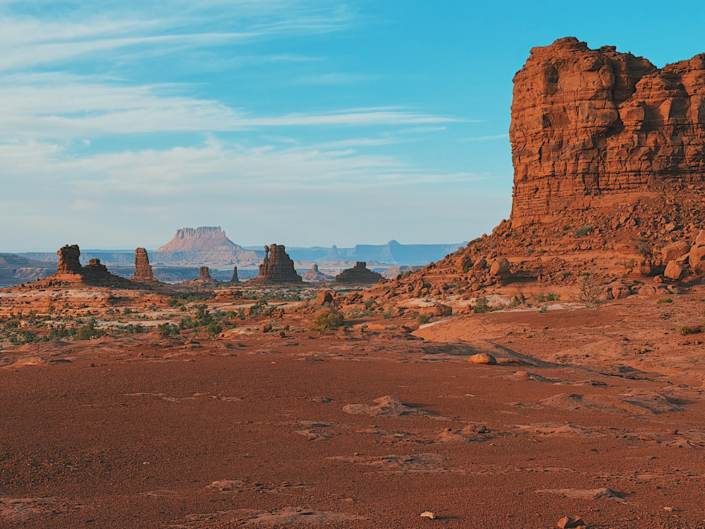
But if you’re up for it, the Maze delivers some of the most remote viewpoints and unique hiking in the Southwest.
➡️ Be inspired and find your next trip idea on my Destinations Page.
Here’s exactly what our 4-day itinerary in the Maze in Canyonlands looked like, plus what it’s really like driving it.
➡️ Still looking for an off-road adventure but less extreme? Try driving Ophir Pass in Colorado. Stunning views and fall colors make Ophir Pass a must-do.
Disclosure: This post may contain affiliate links. If you purchase through these links, I may earn a small commission at no extra cost to you. I only recommend products I’ve personally used, tested, and genuinely love. Thank you for supporting Emma Gets Outside!
The Maze in Canyonlands Quick Facts
In this guide: 4-day itinerary, driving conditions, hiking trails, and what it’s really like exploring the Maze in Canyonlands.
- Location: Canyonlands National Park
- District: Maze District
- Trip length: 4 days
- Vehicle: High-clearance 4WD
- Highlights: Panorama Point, Harvest Scene, Doll House
- Best for: Experienced off-roaders, remote desert travel, multi-day camping
Read my in depth guide for planning your trip to the Maze. Including how to get permits and more about what to expect. See my experience post if you’re looking for Canyonlands Maze District trip inspiration.
Canyonlands Maze Map and Route Overview
Use this map to follow our exact route through the Maze in Canyonlands, including campsites, trailheads, and key stops along the way.
Route Overview:
- Start near Green River (last gas stop)
- Hans Flat Ranger Station (permits)
- Panorama Point campsite
- Flint Trail to Standing Rock Campsite
- Chimney Rock and Doll House hikes
- Exit via Hite
Make a stop at Horseshoe Canyon before you begin your Maze District adventure. Horseshoe Canyon is also in the Maze District, but separate from the Maze proper. Spend an additional day to hike this canyon with incredible pictographs.
Planning a bigger Southern Utah trip? I’ve pinned over 100 hikes, viewpoints, campgrounds, and hidden gems in my interactive Southern Utah Rexby guide.
4-Day Canyonlands Maze Itinerary (Driving and Hiking)
This itinerary starts from the Hans Flat Ranger Station and follows a loop through some of the most remote areas of the Maze District.
While you don’t need a day permit to drive in the Maze in Canyonlands, you do need Canyonlands overnight backcountry permits. You can find these on Recreation.gov.
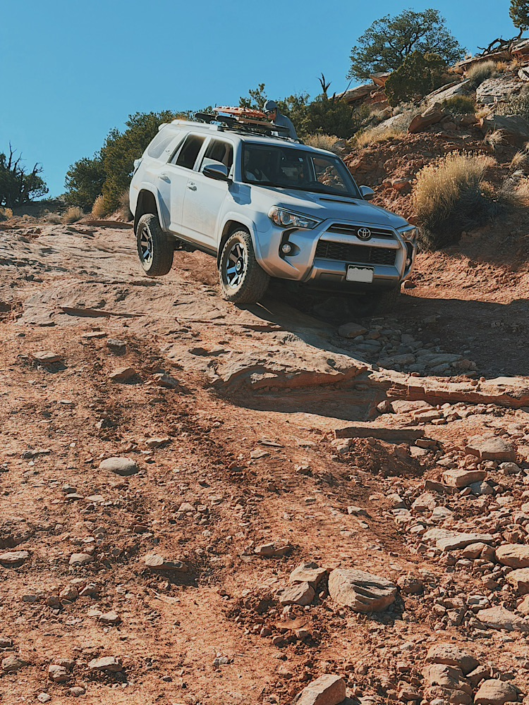
We had six people and two vehicles (a Toyota Tacoma and a 4Runner) in our group. I would highly advise you to bring two capable vehicles in case you need to tow one out of a sticky situation. With the amount of gear and water we packed, six people felt like the perfect number for this trip. Just keep that in mind as you’re planning your Canyonlands Maze adventure.
Day 1: Hans Flat and Drive to Panorama Point
Drive Time: ~3 hours (11 miles) from Hans Flat
Camp: Panorama Point
Highlights: First rough roads, sunset views
I marked Green River on the map as the starting point because that’s a convenient location to fill your gas tank before entering the Maze.
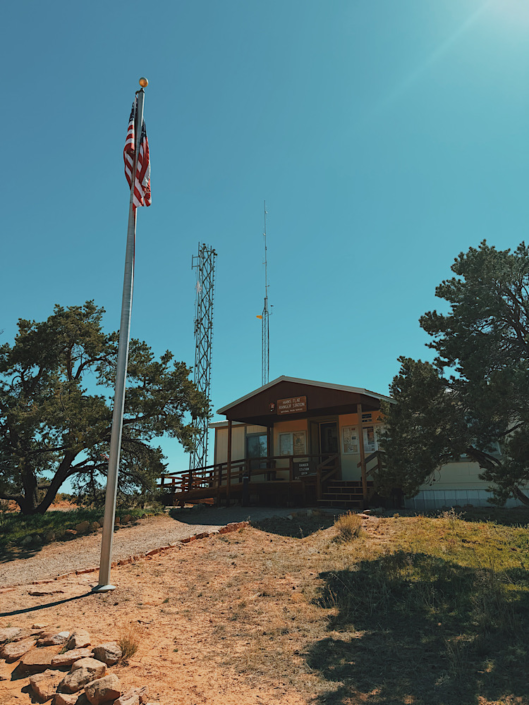
We picked up our overnight permits at the Hans Flat Ranger Station. There, the ranger reiterated the remote nature of our trip and ensured we had enough water, fuel, and a way to pack out human waste. If you have any questions about the roads or the Maze in general, now is the time to ask.
Our objective for the day was to drive to Panorama Point and set up camp for the night. Almost immediately after the Ranger Station, the road got rough. It took us 3 hours to drive the 11 miles from Hans Flat to Panorama Point.
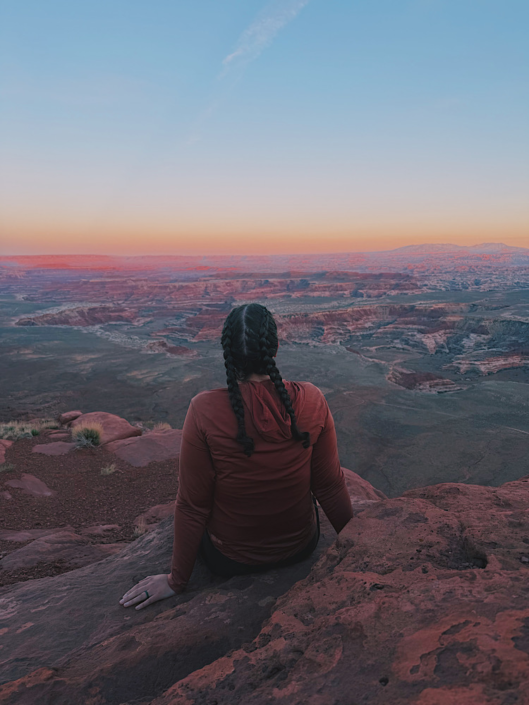
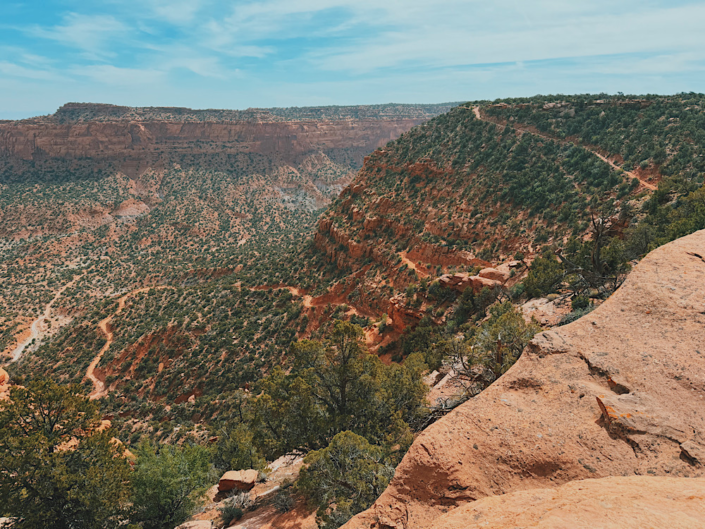
Only one group of up to nine people is allowed to camp at Panorama Point per night. We had the expansive view all to ourselves and intentionally watched the sunset and sunrise. The only human-made light we could see in the complete darkness was a single far-off car driving in the distance.
The moon cast shadows on the canyons. We would have had some incredible stargazing if the moon hadn’t been near full brightness.
Stretch your legs and walk out to the peninsula with 360º views at sunset or sunrise. You’ll find the trailhead right outside the camping area with a sign pointing to an overlook and a trail marked by cairns.
We left camp around 8:30 the next morning to begin the grueling drive to the Standing Rock campsite.
The ranger told us to stop at the Flint Trail overlook to make sure no one was coming up before we started to descend. Not a very two-way traffic-friendly road!
Day 2: Flint Trail Switchbacks and Standing Rock Camp
Drive Time: ~10 hours (42 miles) from Panorama Point to Standing Rock
Camp: Standing Rock
Highlights: Flint Trail and The Teapot
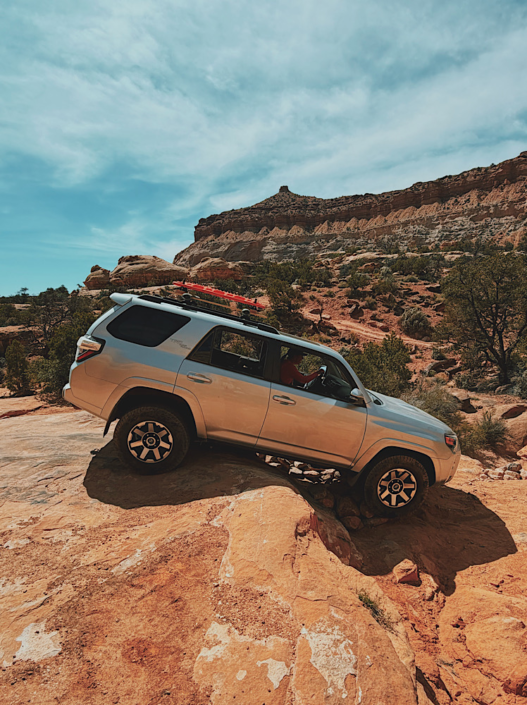
This was by far the hardest driving day of the entire trip. It took us a whopping 10 hours to drive from Panorama Point to the Standing Rock Campsite. The Flint Trail features sharp, steep switchbacks, which we descended. A few of the switchbacks required 3-point turns. A sheer drop off on one side and towering walls on the other.
The real obstacle of the entire trip was a feature called “The Teapot.” Two ledges that aren’t much farther apart than the length-wise wheel distance of the cars. You’ll find one of the roughest roads in all of Canyonlands National Park in Teapot Canyon.
The 4Runner made it down and up the ledges without much complaint. Just a couple of inches away from scraping the frame. The Tacoma, however, got stuck on the second ledge. One of the front wheels wasn’t even touching the ground. The frame was like a teeter-totter balancing on the ledge.

Towing the Tacoma out of the Teapot
We came prepared with a tow rope and pulled the Tacoma out. Luckily, we suspected the Tacoma might not make it through, so we put the 4Runner in front for this very reason.
Practically every turn in the canyon had to be spotted with people outside the vehicle, and rocks built up under ledges to keep them manageable. These were the toughest miles. This section alone made the Maze in Canyonlands feel like one of the most technical drives I’ve ever done.
About 8 miles from the Standing Rock Campsite, the road evened out, and driving became much easier. There are a few campsites in this area: The Wall, Standing Rock, and Chimney Rock. We booked two nights at Standing Rock. The Wall is definitely an excellent spot, but Chimney Rock lacks privacy due to nearby trailhead access.
The Maze in Canyonlands put on another show for sunrise and sunset. Clouds took on a cotton-candy glow as the sandstone burned orange.
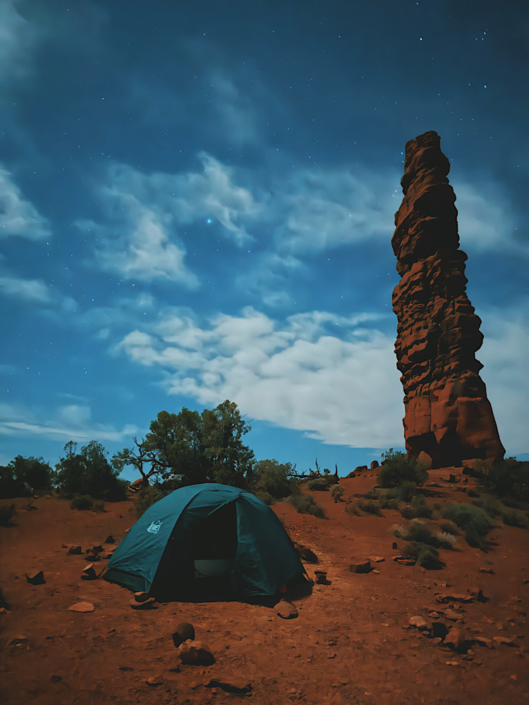
Standing Rock Campsite
Day 3: Doll House and Hiking in the Maze
Drive Time: ~2 hours (10 miles) Standing Rock to Chimney Rock to Doll House and Back
Camp: Standing Rock
Highlights: Magnus Arch, Harvest Scene, Granary
Finally, we had a chance to hike in the Maze proper. The trailhead for Pete’s Mesa and the Harvest Scene Loop is at Chimney Rock. When we were at Hans Flat, the ranger told us to start hiking on the mesa and descend the Maze from there. AllTrails recommends the other way around.
➡️ Check out my day hike packing list to be prepared for hiking in the Maze.

Magnus Arch was worth the small detour
Harvest Scene Loop
We were glad we started on the mesa because there wasn’t much shade, and hiking the flat 3 miles back to the car would have felt much longer in the afternoon heat. Plus, we detoured to Magnus Arch right before descending into the Maze. If we went the other way around, we probably wouldn’t have chosen to make the trail longer.
➡️ Discover more of the best hikes near Moab in my complete guide.
There were well-placed cairns the whole way, and we only got off-track a couple of times. I had the AllTrails map downloaded to my Garmin Watch and was able to navigate with ease. All in all, I clocked 9.88 miles, 1,437 feet of elevation gain, and it took 6 hours for our group of 6 with stops.
➡️ Check out the nearby Colonnade Arch trail if you want a short hike with a big reward.
The Doll House
We drove another 4 miles to The Doll House from Chimney Rock. Well, we actually drove about 3.5 miles and parked just before the Doll House. There were some obstacles that would have taken us longer to get the Tacoma and 4Runner through than it would have been to walk.
➡️ Check out the Goblin’s Lair hike in Goblin Valley State park if you’re looking for easy access hiking around this area.
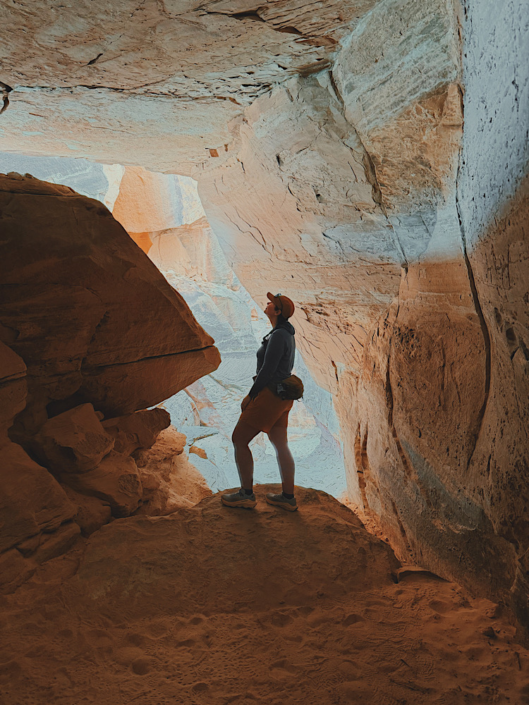
The Granary Trail doesn’t have a listing on AllTrails, but you can access it from the parking area by the Doll House campsites. There is a sign pointing towards Spanish Bottom Trail. The trail winds through a slot canyon section and connects you to the Granary Trail. Ancestral Puebloans built the granary to store corn.
➡️ I wore my trail runners for each of these hikes. They were lightweight and breathable for the warm conditions.
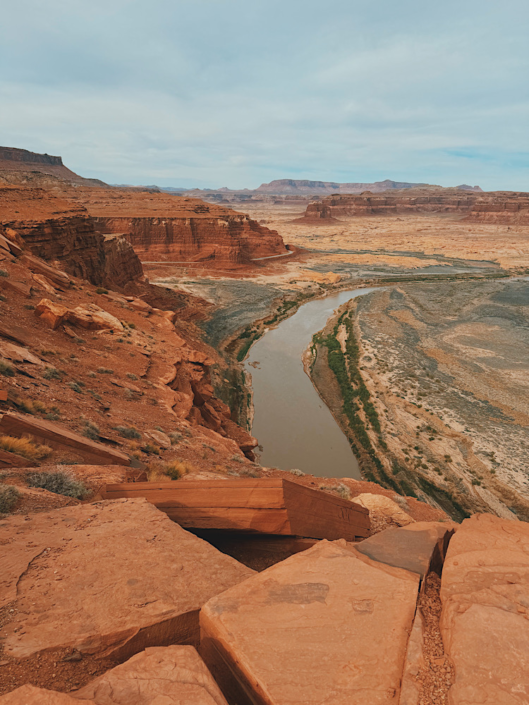
You can see the Colorado River from the trail as well. The Spanish Bottom Trail descends 1,000 feet down to the river. We talked to a couple who arranged to have a boat drop them off and pick them up 7 days later. They planned to go backpacking through the canyons.
After our excursion, we returned to Standing Rock for our last night of camping in the Maze in Canyonlands.
Day 4: Exit the Maze via Hite and Long Drive Out
Drive Time: ~10 hours (52 miles) from Standing Rock to Hite
Highlights: Hite Overlook
Instead of retracing our route and ascending the Flint Trail switchbacks to the Hans Flat Ranger Station, we decided to drive to Hite. The park ranger estimated that this alternative road saved us about an hour of driving.
We did have to drive through the Teapot again to get to the road junction, though. This time, the Tacoma made it without needing a tow. Afterward, when we had cell service, we determined that the wheelbase of the Tacoma is 18” longer than that of the 4Runner. Quite substantial when every inch counts on these steep, tight obstacles.
The road to Hite featured about 35 miles of easy-going dirt trail. Yet, it still took us 9 hours to drive from Standing Rock to Hite. Make a quick stop at the Hite Overlook to stretch your legs.
The only thing that could make up for sitting so many hours in the car the past several days was a steaming burger and crispy fries paired with an ice-cold shake from Stan’s Burger Shak in Hanksville. For me, you can’t beat the refreshing combo of mint and Oreo in a Grasshopper shake.
What It’s Really Like Driving the Maze
Driving the Maze in Canyonlands is less about distance and more about patience, focus, and problem-solving.
- Expect extremely slow driving (hours for short distances)
- Obstacles require spotting and teamwork
- Mental fatigue is real (constant focus)
- Navigation is easier than expected (good signage)
- Having multiple drivers helps significantly
Is the Maze in Canyonlands Worth It?
It’s worth it if:
- You enjoy remote, rugged travel
- You have off-road experience
- You want a unique Canyonlands experience
It might not be worth it if:
- You’re new to off-roading
- You want quick access to viewpoints
- You’re short on time
Driving to the Maze in Canyonlands is absolutely worth it. My only gripe would be that I wish we could have planned a couple more days to hike around the Standing Rocks and Doll House areas. You work so hard to get to the Maze that a couple more days to enjoy it would have been ideal.
Don’t attempt to drive in the Maze if you don’t have much off-road experience. Wheel placement was everything. Larger trucks can get stuck easily, and we saw several pictures of flipped cars at the Ranger Station. My advice: Try a few trails around Moab to get more comfortable. The ledges and angles in the Maze can be extreme. It was really helpful to have several people spotting vehicles through obstacles.
This isn’t a casual road trip; it’s something you work for, which is exactly what makes it so memorable.
Before You Go: Key Tips for the Maze in Canyonlands
- Secure overnight backcountry permits
- No cell service anywhere in the Maze
- High-clearance 4WD required
- Bring all water (none available)
- Pack out human waste (required)
- Carry recovery gear (tow rope, traction boards, etc.)

📌 Pin this image on Pinterest to save this post for reference.
The Maze in Canyonlands FAQ
Do you need 4WD for the Maze in Canyonlands?
Yes, a high-clearance 4WD vehicle is required. The roads include steep ledges, deep sand, and narrow sections that are not suitable for low-clearance vehicles.
How long does it take to drive the Maze District?
Even short distances take hours. Expect to spend multiple days exploring the Maze due to slow driving conditions.
Is the Maze in Canyonlands dangerous?
It can be if you’re unprepared. The remoteness, lack of cell service, and technical driving require planning, proper gear, and experience.
Can beginners drive the Maze in Canyonlands?
This is not recommended for beginners. Prior off-road driving experience is important due to the technical terrain.