Arches National Park Hiking Trails: 8 Hikes Worth Doing
Looking for Arches National Park hiking trails worth adding to your trip? I’ve hiked almost every established trail in the park, from easy walks to Windows and Double Arch to the full Devil’s Garden Loop and the maze-like Fiery Furnace. I’ve also sought out quieter hikes like Ring Arch and Tower Arch that many visitors never see.
I live about 1.5 hours from Moab and return to Arches regularly, so I’ve been able to explore beyond the hikes most people squeeze into a first visit.
If it’s your first trip, I’d prioritize Delicate Arch and Devil’s Garden. If you’ve already seen the classics, Ring Arch, Tower Arch, and Fiery Furnace are where I’d go next.
Below are eight Arches National Park hiking trails I’ve personally completed, organized from easy walks to more adventurous routes, plus the itineraries I’d recommend depending on how much time you have.
➡️ Find more trails around Moab and beyond in my Utah Adventure Guide.
Disclosure: This post may contain affiliate links. If you purchase through these links, I may earn a small commission at no extra cost to you. I only recommend products I’ve personally used, tested, and genuinely love. Thank you for supporting Emma Gets Outside!
Best Arches National Park Hiking Trails: My Quick Picks
After hiking almost every trail in Arches, these are the ones I’d prioritize depending on the kind of experience you want:
Best overall hike: Devil’s Garden Loop
If I could only choose one longer hike in Arches, this would be it. You can see multiple arches along one trail, and the primitive section gets you away from many of the park’s crowds.
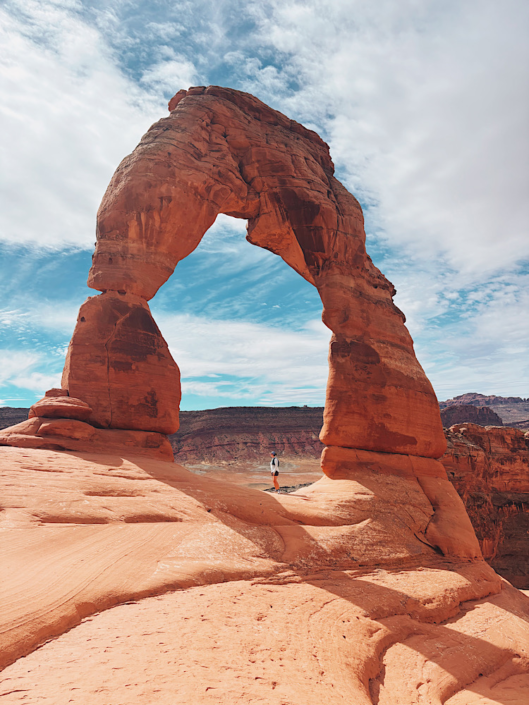
Best iconic hike: Delicate Arch
It’s busy for a reason. The hike takes you directly to Utah’s most famous arch, with the La Sal Mountains creating an incredible backdrop.
Best easy hikes: Windows Loop and Double Arch
These short trails are close together and give you a lot of scenery for very little mileage.
Best hike without crowds: Ring Arch
I hiked Ring Arch in November and didn’t see another person the entire time. It’s one of my favorite recommendations for returning Arches visitors.
Most unique hike: Fiery Furnace
This permit-required route feels completely different from a normal hiking trail. You navigate through a maze of sandstone fins, narrow passages, and dead ends.
Best hidden-gem adventure: Tower Arch
The extra drive keeps the crowds down, and the hike includes scrambling, sand, the Marching Men formation, and a huge arch you can walk underneath.
Windows Arches
1. Windows Loop Trail
Distance: 0.7 miles
Elevation gain: 127 feet
Difficulty: Easy
Crowds: High
My verdict: One of the best easy trails for a first visit to Arches.
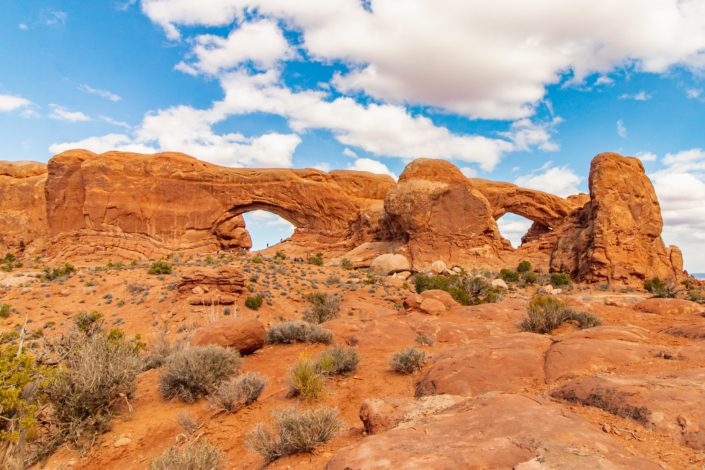
The Windows Loop is more of a walk than a hike, but it packs several impressive formations into less than a mile. You can get close to both the North and South Windows, with Turret Arch nearby.
The short distance and relatively flat terrain make this one of the most accessible Arches National Park hiking trails, which also means it gets busy. I’d come early or later in the day if you want a quieter experience.
Double Arch
2. Double Arch Trail
Distance: 0.6 miles
Elevation gain: 95 feet
Difficulty: Easy
Crowds: High
My verdict: Absolutely worth adding to Windows because the two trailheads are right next to each other.
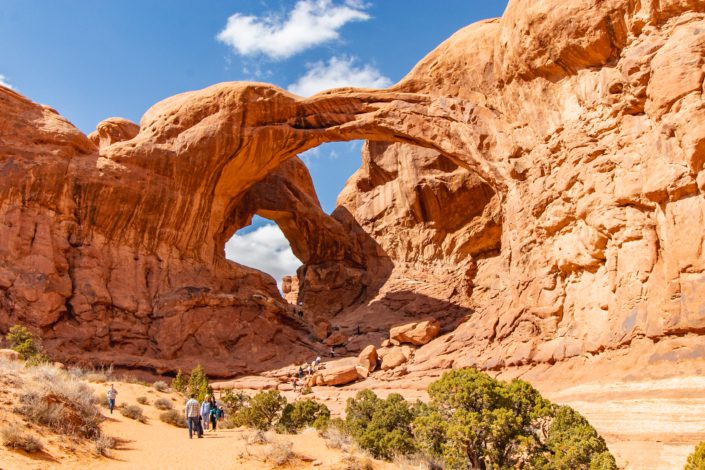
Double Arch is another short walk that gets you surprisingly close to a massive formation. The Windows and Double Arch trails leave from the same general parking area, so I always recommend seeing both while you’re here.
I recommend scrambling up to sit beneath the far arch. From there, you can peer through the opening to the landscape beyond.
You get two impressive stops for very little additional hiking, making this combination particularly good if you only have a few hours in Arches.
The Delicate Arch
3. Delicate Arch Trail
Distance: 3.2 miles
Elevation gain: 629 feet
Difficulty: Moderate
Crowds: High
My verdict: The classic Arches hike is worth doing at least once.
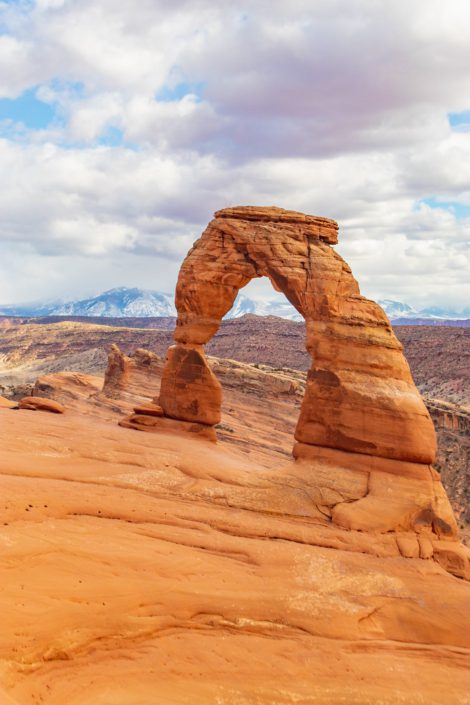
Delicate Arch is the most iconic arch in the park. It stands alone on a cliff edge with an impressive view of the La Sal Mountains behind it. If you get to see the La Sals with a dusting of snow, I think the view is even better.
The trail is pretty much straight uphill on the way there, and there’s very little shade. Start early when temperatures are cooler and bring plenty of water, especially during warmer months.
The trail can also get very crowded. There are a couple of places where it narrows significantly, which can create bottlenecks.
Emma’s Tip: Don’t skip Delicate Arch just because it’s popular. If you’ve never seen it before, I still think it deserves a spot on your first Arches trip.
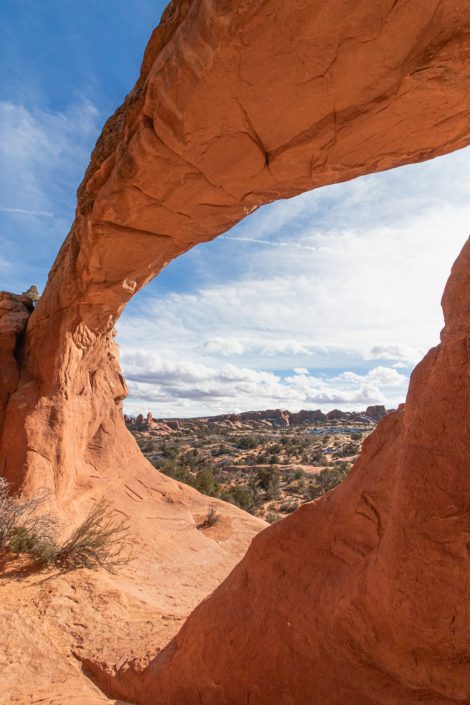
Through Broken Arch
4. Sand Dune Arch to Broken Arch Loop
Distance: 2.6 miles
Elevation gain: 226 feet
Difficulty: Easy–moderate
Crowds: Moderate
My verdict: A great alternative when you want an easy hike that feels quieter than the park’s biggest attractions.
Sand Dune Arch to Broken Arch Loop Map
This lovely little hike is less busy than many of the easy and moderate hikes in Arches. It only takes a few minutes to walk to Sand Dune Arch, so if you’re looking for a quieter roadside stop, this is a great one.
I especially enjoyed the more private feeling around Sand Dune Arch. Walking among the sandstone fins is like a mini Fiery Furnace.
Continue toward Broken Arch and you can walk right underneath it for an impressive photo opportunity.
If you want more than a short viewpoint walk but aren’t looking for a difficult hike, this is a fantastic middle-ground option.
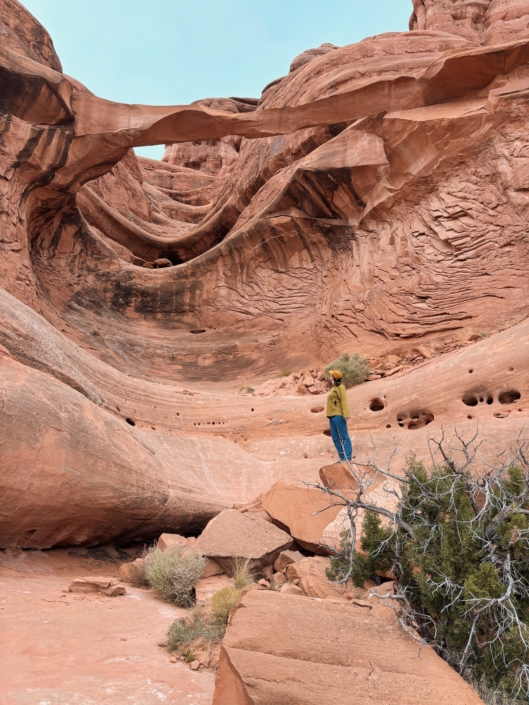
Ring Arch
5. Ring Arch Trail
Distance: 2.9 miles
Elevation gain: 170 feet
Difficulty: Easy–moderate
Crowds: Very low
My verdict: One of my favorite lesser-known hikes in Arches.
I hiked Ring Arch in November and didn’t see a single other person the entire time. How often does that happen in a national park?
Ring Arch usually isn’t included on the standard Arches National Park trail map, likely because there isn’t a designated parking lot for the trail.
Park along the road across from the Courthouse Wash Trail. I recommend downloading a trail map before you start because the trail is much less developed than the park’s popular routes.
Use my Google Maps pin to find the trailhead: Ring Arch Parking
The hike winds through a flat, wide canyon before ending with a brief scramble to the base of Ring Arch. The arch itself is impressive, but having the entire trail to ourselves made this hike particularly memorable.
Emma’s Tip: Save Ring Arch for your second trip to Arches if you’re short on time during your first visit. Once you’ve seen the famous arches, this is exactly the kind of trail I’d seek out.
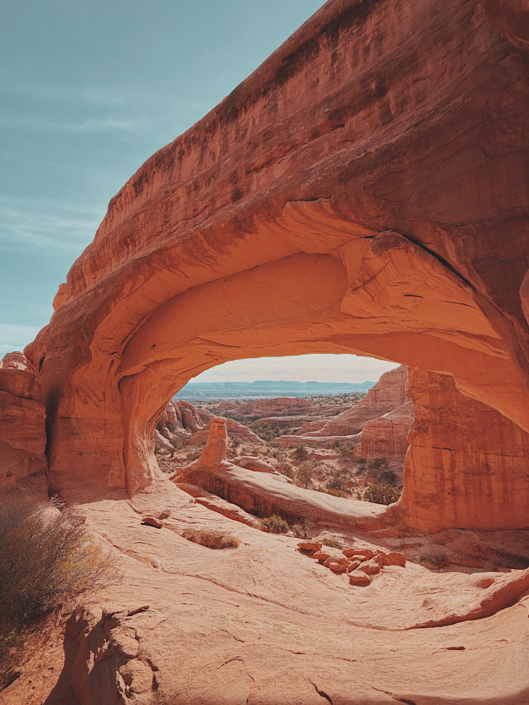
Tower Arch
6. Tower Arch Trail
Distance: 2.6 miles
Elevation gain: 626 feet
Difficulty: Moderate
Crowds: Low
My verdict: Worth the extra drive if you want to see a completely different side of Arches.
Tower Arch is another off-the-beaten-path trail that sees relatively few visitors. Unlike most hikes in this guide, it isn’t located directly along the park’s main paved road.
You’ll turn onto Salt Valley Road and drive roughly 20 minutes on dirt road to reach the trailhead. There is a pit toilet at the parking area.
Use this Google Maps link to find Tower Arch.
Once you start hiking, the trail quickly climbs through a brief scramble before descending again. Along the way, you’ll pass the impressive Marching Men rock formation.
Then comes one of the most memorable parts: climbing a tall sand dune before reaching Tower Arch. Keep an eye out for the smaller arch off to the right as you approach.
You can walk underneath Tower Arch and look back over the valley. We saw only a few groups during our hike and had the arch to ourselves for a while.
Emma’s Tip: Don’t underestimate how much extra time Tower Arch requires because of the drive. I’d save it for a half-day when you aren’t trying to squeeze in several attractions along the main Arches road.
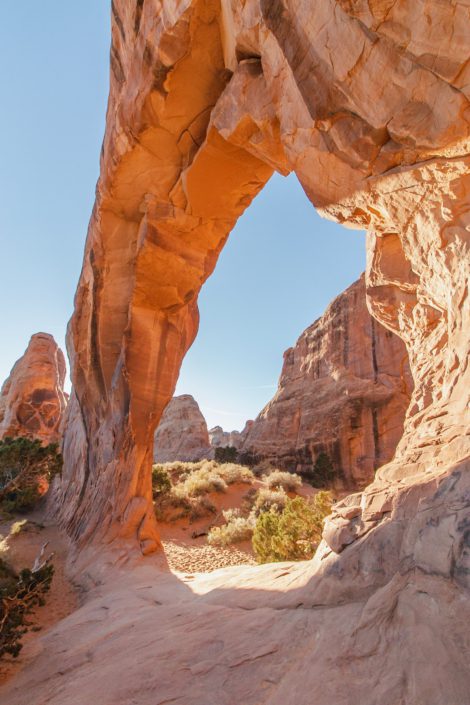
Pine Tree Arch
7. Devil’s Garden Loop Trail
Distance: 8+ miles
Elevation gain: 1,158 feet
Difficulty: Difficult
Crowds: High near Landscape Arch; considerably lower on the primitive trail
My verdict: My favorite longer hike in Arches National Park.
If you have the time and hiking experience, complete the entire Devil’s Garden Loop. You’ll see several arches along one route and get away from many of the crowds once you reach the primitive section.
Shortly after leaving the trailhead, you can take a detour to Tunnel Arch and Pine Tree Arch before returning to the main trail.
I recommend hiking the loop so that you enter the primitive trail at the warning sign rather than walking to Landscape Arch first. This reduces backtracking and saves Landscape Arch for later in the hike.
The primitive section is where Devil’s Garden becomes an adventure. You’ll encounter scrambling, sandstone fins, ledges, and less obvious route-finding, so you should be a confident and prepared hiker before completing the entire loop.
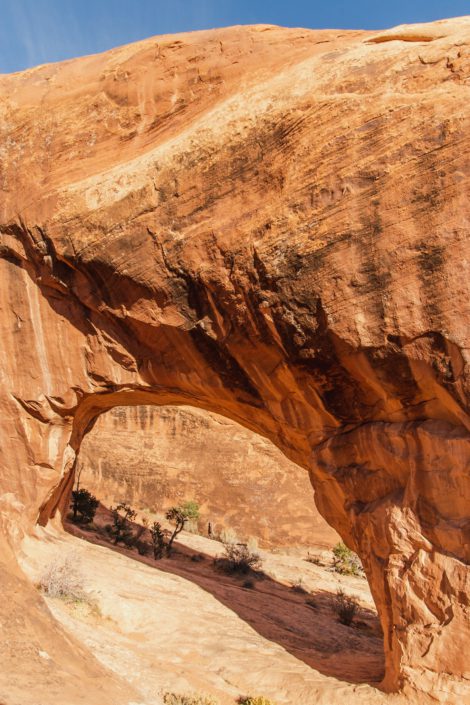
Private Arch
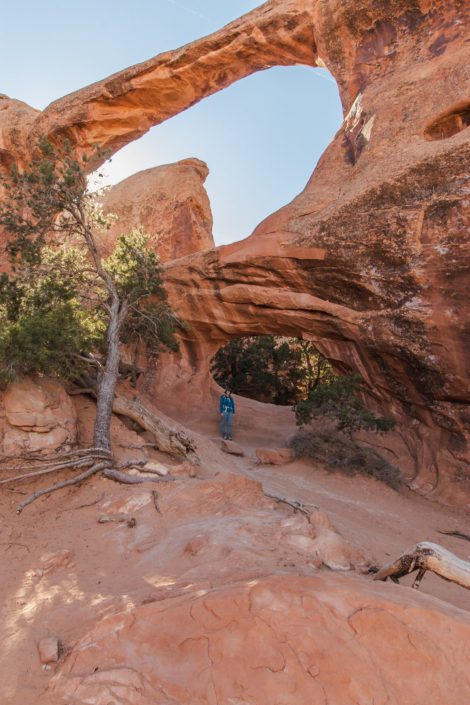
Double O Arch
Private Arch is one of the major arches along this section. Later you’ll reach Double O Arch, one of my favorites in Arches because of its unusual shape.
You’ll also have the option to detour to Dark Angel, but I don’t think it’s worth adding roughly another mile to the hike. Dark Angel is a standalone rock tower rather than an arch, and I’d rather spend that time enjoying the arches along the main route.
Don’t skip Navajo and Partition Arches. Partition Arch is particularly cool because you can look through the opening toward the valley below.
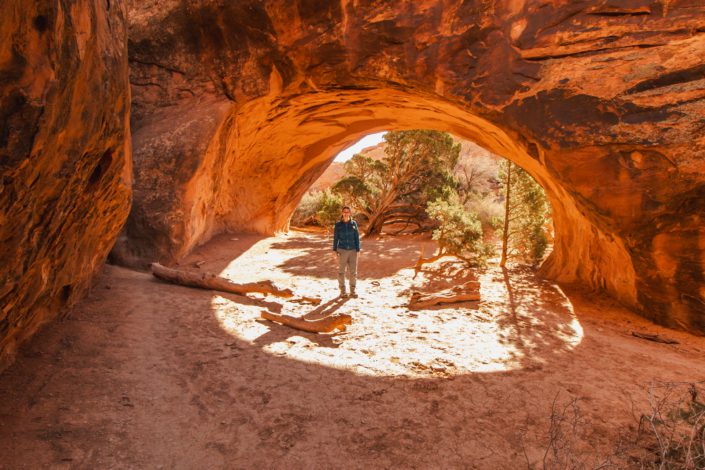
Navajo Arch
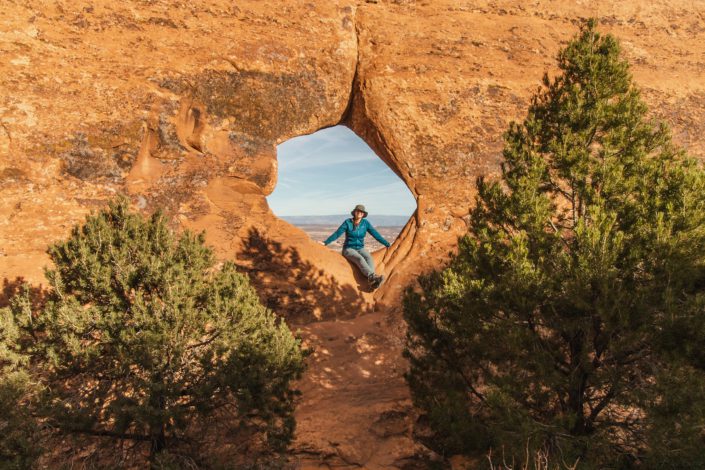
Partition Arch
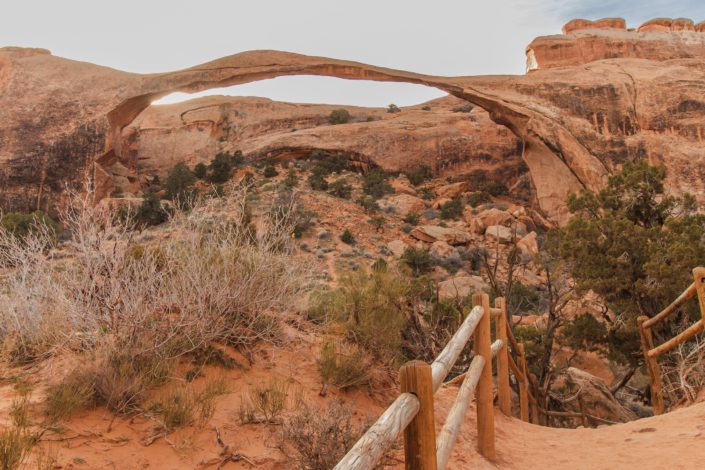
Landscape Arch
Finally, you’ll reach Landscape Arch before heading back toward the trailhead.
Emma’s Tip: Most visitors don’t need to complete the entire loop. If you’re a first-time visitor who wants a shorter hike, go as far as Landscape Arch or Double O Arch. But if you’re an experienced hiker and have enough time, the primitive loop is what makes Devil’s Garden one of my favorite Arches hikes.
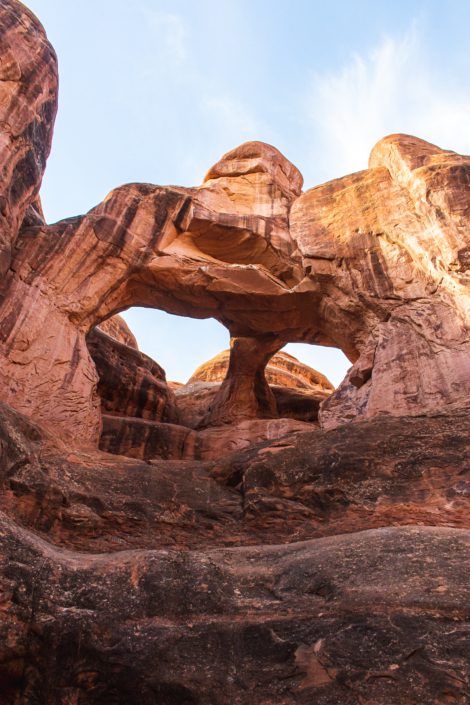
Skull Arch
8. Fiery Furnace
Distance: Varies; my route was about 3.5 miles
Elevation gain: About 700 feet on my route
Difficulty: Difficult navigation and scrambling
Permit: Required
My verdict: The most unique hiking experience I’ve had in Arches.
Fiery Furnace isn’t a normal hiking trail. Instead, you explore a maze of towering sandstone fins, narrow passages, dead ends, and arches.
There is no single designated trail through Fiery Furnace, which is exactly what makes it so fun, and why you need to be comfortable navigating.
I’ve done Fiery Furnace twice, and having a downloaded map makes it much easier to find formations like Skull Arch and Surprise Arch. Both can be easy to miss if you don’t know where to turn.
The best way I can describe Fiery Furnace is a giant sandstone corn maze. Take your time exploring, expect to hit dead ends, and enjoy figuring out how the different passages connect.
A permit is required to enter Fiery Furnace. You can explore independently with a self-guided permit or join a ranger-guided hike. Check the National Park Service for current permit availability, fees, and requirements before your trip, since these details can change.
Fiery Furnace takes more planning than most Arches National Park hiking trails, but I think it’s completely worth the effort. There’s nothing else quite like it in the park.
Emma’s Tip: Don’t rush through Fiery Furnace trying to follow a predetermined route perfectly. Exploring the side passages and figuring out where you’re going is part of the experience.
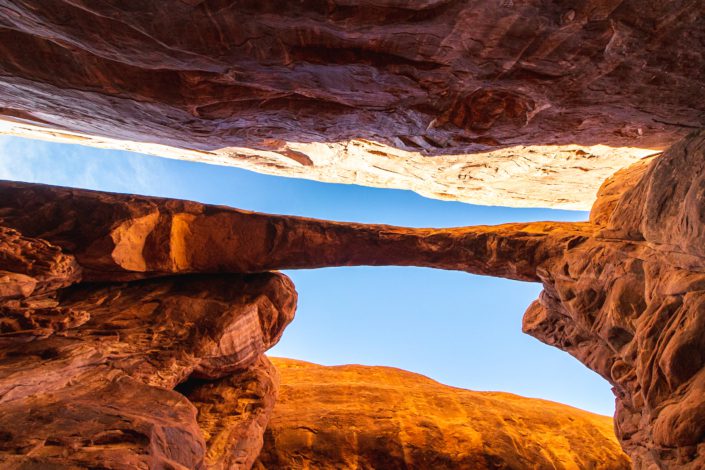
Surprise Arch
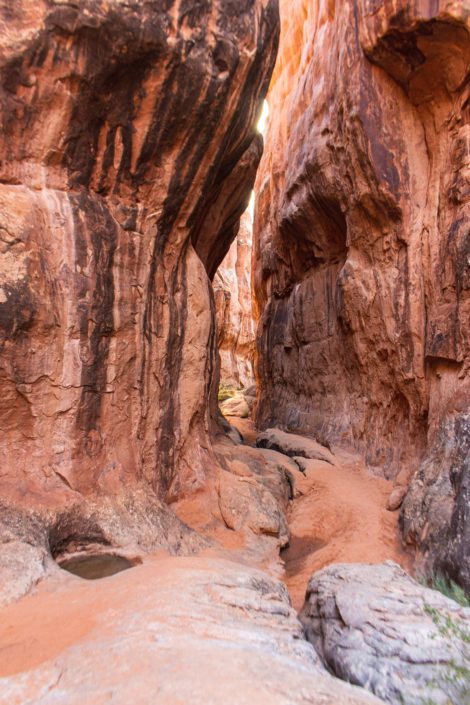
Inside Fiery Furnace
Which Arches National Park Hiking Trail Should You Choose?
For a first visit to Arches, I’d prioritize Delicate Arch, Windows and Double Arch, and at least part of Devil’s Garden. If you’re looking specifically for easy hikes, Windows, Double Arch, and Sand Dune Arch to Broken Arch give you impressive scenery without committing to a long day.
Experienced hikers should look at the full Devil’s Garden Loop and Fiery Furnace, while returning visitors looking for something new should try Ring Arch or Tower Arch. These are some of the trails that have given me my quietest experiences in an otherwise very busy national park.
Arches National Park Hiking Itineraries
If you aren’t sure how to combine these trails, these are the itineraries I’d use depending on how much time you have and whether it’s your first visit.
Half Day in Arches for First-Time Visitors
Drive the Windows Road to hike Windows and Double Arch. Then continue toward Delicate Arch and hike it if you have enough time.
Why I recommend this: You get several of the park’s most recognizable arches in a relatively short visit without spending your entire day driving between trailheads.
Full Day in Arches for First-Time Visitors
Start with Delicate Arch early in the morning when temperatures are cooler.
Then drive to Devil’s Garden. Hike past Landscape Arch toward Navajo and Partition Arches and continue toward Double O if you have the time and ability. You don’t necessarily need to complete the full primitive loop on your first visit.
Finish with Windows and Double Arch if you still have time and energy.
Why I recommend this: You get the iconic Arches experience while still venturing beyond the shortest and busiest trails.
Half Day for Returning Arches Visitors
Get a permit for Fiery Furnace and make that your main adventure.
If you have additional time, hike Ring Arch on your way toward the park entrance.
Why I recommend this: Both experiences show you a side of Arches that many first-time visitors never see.
Full Day for Experienced Hikers
Hike the entire Devil’s Garden Loop, including the primitive trail.
Why I recommend this: Devil’s Garden gives you the most bang for your buck if hiking is your priority. You’ll see multiple arches, get some scrambling in, and leave a significant portion of the crowds behind.
Best Time for Hiking in Arches National Park
I prefer hiking in Arches during the cooler months and generally avoid summer.
I’ve found February, March, October, and November particularly comfortable for hiking. I’ve even experienced temperatures around 70°F in February, although desert weather can vary considerably.
Summer brings intense heat, limited shade, crowded parking lots, and more visitors on the trails. Many Arches hikes are completely exposed to the sun, making high temperatures particularly uncomfortable.
Spring and fall offer a better balance of comfortable hiking temperatures and daylight. Winter can also be fantastic if you’re prepared for cold temperatures and potentially icy or snowy conditions.
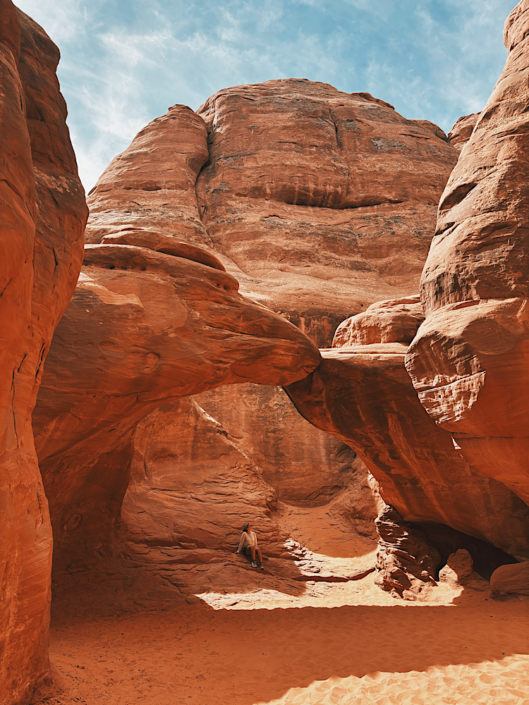
What to Know Before Hiking in Arches National Park
Arches is easy to underestimate. Many trails aren’t particularly long, but the combination of dry air, strong sun, exposed sandstone, and limited shade can make hiking feel harder than the mileage suggests.
If you’re not used to hiking in Southern Utah, read my guide to hiking in the desert before your trip.
Bring more water than you think you’ll need. I also bring electrolytes on hot hiking days, especially when I’m sweating heavily.
Download trail maps before leaving service. This is particularly important for Fiery Furnace, Ring Arch, and the primitive portion of Devil’s Garden.
Protect yourself from the sun. Sunscreen, a hat, sunglasses, and sun-protective clothing make exposed desert hiking much more comfortable.
Stay on durable surfaces. Avoid stepping on cryptobiotic soil and follow Leave No Trace principles throughout the park.
Finally, check current park conditions and entrance requirements with the National Park Service shortly before your trip. Rules and seasonal operations can change.
More Hiking Around Moab
Arches has incredible trails, but don’t limit your hiking trip to the national park. Some of my favorite Moab hikes are outside Arches, where you can often find fewer crowds and trails that allow dogs.
If you’re planning a longer trip, read my guide to the best hikes in Moab, including trails in Arches, Canyonlands, and outside the national parks.
For dog-friendly hikes, I particularly like Mary Jane Slot Canyon, Grandstaff Canyon and Fisher Towers.
And if you’re deciding how to divide your time between the two nearby national parks, read my Arches vs Canyonlands comparison. Spoiler: I love Arches, but Canyonlands wins for me.
Planning a bigger Southern Utah trip? I’ve pinned over 100 hikes, viewpoints, campgrounds, and hidden gems in my interactive Southern Utah Rexby guide.
📌 Pin this image on Pinterest to save this post for reference.
Arches National Park Hiking Trail FAQs
What are the best hikes in Arches National Park?
My favorite hike in Arches National Park is the full Devil’s Garden Loop. It combines multiple arches, scrambling, sandstone fins, and a primitive section with fewer crowds. For first-time visitors, I’d also prioritize Delicate Arch, Windows, and Double Arch.
What is the best easy hike in Arches National Park?
Windows Loop and Double Arch are two of the best easy hikes in Arches. They’re short, located near each other, and let you see several impressive formations without much elevation gain.
What is the hardest hike in Arches National Park?
Of the trails I’ve completed, the full Devil’s Garden Loop requires the most endurance, while Fiery Furnace requires the most route-finding. Both are better suited to hikers comfortable with scrambling and navigating less-defined routes.
Can you avoid crowds while hiking in Arches?
Yes. I’ve had some surprisingly quiet hiking experiences in Arches by visiting during the off-season and choosing lesser-known trails. I hiked Ring Arch in November without seeing another person.
Do you need permits to hike in Arches National Park?
Most Arches hiking trails don’t require an individual hiking permit, but Fiery Furnace has special access requirements. Check the National Park Service before your trip for current permit and entrance requirements.