Best Hikes in Moab: 19 Trails I’d Recommend to a Friend
The best hikes in Moab, based on my years of exploring Arches, Canyonlands, and the trails beyond.
Moab is one of the best hiking destinations in the United States. Between Arches National Park, Canyonlands National Park, and the incredible trails just outside the parks, you could spend weeks here and still leave with more hikes on your list.
After years of exploring Moab, I’ve learned that the best hikes in Moab aren’t always the busiest or the most famous. Some of my favorite adventures are hidden in remote corners of Canyonlands, while others are easy half-day hikes closer to downtown.
This isn’t just a list of popular Moab hikes. It’s the list I would send to a friend planning their trip.
➡️ If you want to compare all Mighty Five national parks in Utah, see my comprehensive comparison guide.
Instead of simply telling you which hikes are beautiful, I’ll help you answer questions like:
- Which hikes are actually worth your limited time?
- Can you combine hikes into the same day?
- Which are dog-friendly?
- Is it worth camping nearby?
- And which hikes I’d save for a return visit.
Whether you’re visiting Moab for a weekend or planning a week of hiking, this guide will help you build an itinerary around the trails that best match your travel style.
➡️ Find more Utah trails on my Utah Adventure Guide page. Use my detailed posts to help plan you trip.
Disclosure: This post may contain affiliate links. If you purchase through these links, I may earn a small commission at no extra cost to you. I only recommend products I’ve personally used, tested, and genuinely love. Thank you for supporting Emma Gets Outside!
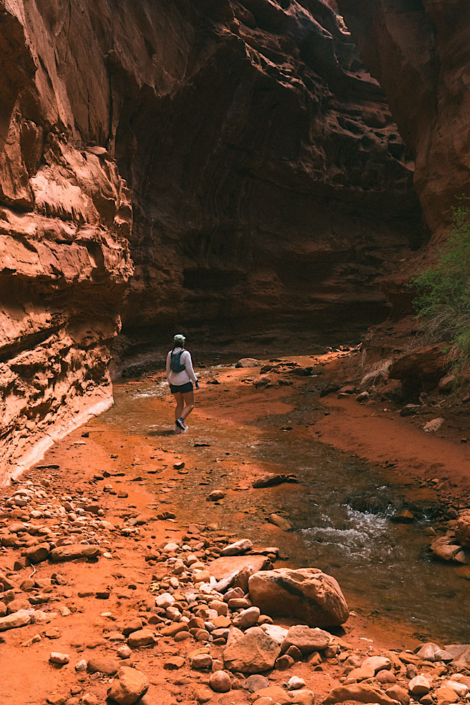
Best Hikes in Moab (And Beyond) Map
Trying to visualize how all of these hikes fit together? I created a Southern Utah adventure map to help you plan your trip beyond just the trails.
My Rexby guide includes all of the hikes mentioned here, plus 100+ other saved spots across Southern Utah, including campsites, restaurants, viewpoints, and other places worth adding to your itinerary.
Use it to build your own Southern Utah adventure, figure out which hikes pair well together, and spend less time researching and more time exploring.
Best Hikes in Moab Table of Contents
Use the links to jump down to each section.
Before You Hit the Trail: Essential Moab Hiking Tips
Best Hikes in Arches National Park
— Help Me Pick a Hike in Arches
Best Hikes in Canyonlands National Park (Divided by District):
— Island in the Sky (Closest to Moab)
— The Needles (Long Day Trips)
— The Maze (Remote Camping Required)
Best Hikes in Moab Outside the Parks (Dogs Allowed)
Moab Hiking Decision Guide (Which hike is right for you?)
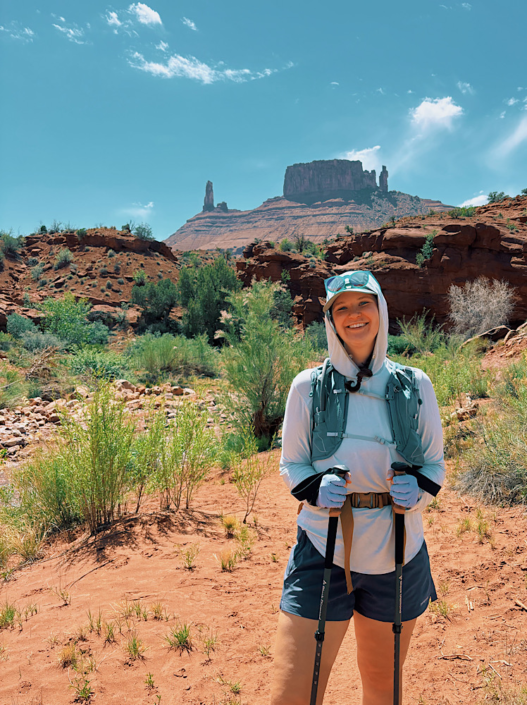
Before You Hit the Trail: Essential Moab Hiking Tips
Moab is a bucket list hiking destination, but the desert environment requires more planning than many visitors expect. Even short hikes can involve extreme heat, little shade, limited water, confusing navigation, and long distances from services.
➡️ Check if you’re prepared with my day hike packing list.
Here are the things I think every hiker should know before hitting the trail.
Plan for Desert Conditions
Moab trails are often exposed with very little shade. Start early when possible, avoid hiking during the hottest part of the day in summer, and bring more water than you think you need.
Many trails are more physically demanding than their mileage suggests because of sand, scrambling, elevation gain, and desert heat.
My desert hiking guide covers how I plan water, sun protection, clothing, and hot-weather hikes.
Wear Appropriate Clothing
I always wear long-sleeves when I’m going to be out in the sun. Lightweight hiking hoodies and pants will protect your skin and keep you cooler. Branwyn is my go-to for merino bras and underwear (yes, merino actually wicks sweat and stays comfortable in the heat). Learn more about hiking clothing that will keep you comfortable on the trail:
➡️ Hiking Pants For Curvy Women
Download Maps Before You Go
Do not rely on cell service in Moab. Many trails, especially in Canyonlands, have little to no service.
Download your maps ahead of time and bring offline navigation. This is especially important for remote or less-traveled trails where route finding is part of the adventure.
Dogs in Moab
No dogs are allowed on hiking trails in Arches National Park or Canyonlands National Park.
If you’re traveling with a dog, focus on hikes outside the parks. Great dog-friendly options include Fisher Towers, Grandstaff Canyon, Mary Jane Slot Canyon, Mill Creek, and Corona Arch.
Always bring water for your dog and remember that hot sandstone can quickly burn paws.
Flash Flood Safety
Understand that flash floods are a real danger in desert canyons, especially on slot canyon hikes.
Check the weather before heading out and be aware that storms miles away can send water rushing through areas that appear completely dry. If storms are possible, avoid entering narrow canyons.
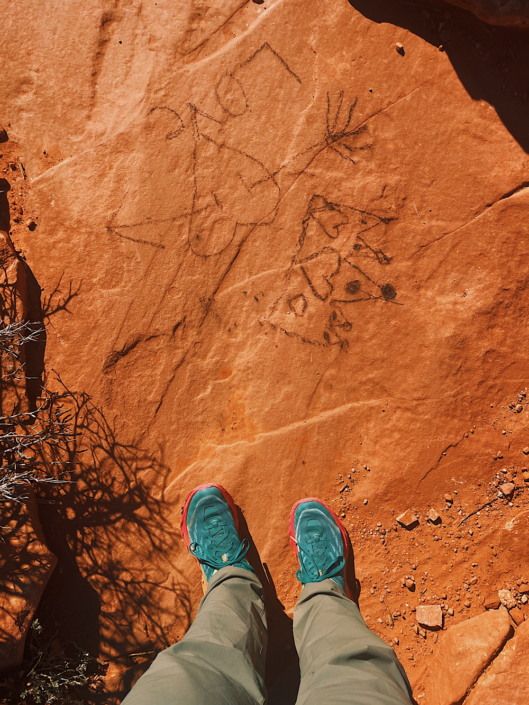
Unfortunately, not everyone treats these places with respect. Help keep Moab beautiful by practicing Leave No Trace.
Leave No Trace in the Desert
Moab’s landscapes are fragile. Help protect these places by:
- Staying on established trails
- Never walking on biological soil crust
- Leaving rocks, plants, fossils, and artifacts where you find them
- Packing out all trash and toilet paper
- Respecting archaeological sites
Many of the places on this list are special because they have been protected for generations. The goal is to leave them just as intact for the next person.
A Note on Trip Commitment
A trail’s mileage doesn’t always tell the full story in Moab. A 3-mile hike to an arch near town and a 3-mile hike deep in Canyonlands are completely different experiences. Some trails require long drives, permits, difficult navigation, or nearby camping to fully enjoy.
Throughout this guide, I include a Trip Commitment rating under each trail snapshot to help you understand the real time and planning required, not just the time spent walking.
➡️ Not sure whether you where you want to spend time? Read my Arches National Park vs Canyonlands guide to help you decide.
Best Hikes in Arches National Park
If it’s your first time visiting Moab, Arches National Park is the perfect place to start. From world-famous landmarks like Delicate Arch to adventurous hikes through sandstone fins and hidden corners of the park, there’s something here for every type of hiker.
One important thing to know before planning your trip: dogs are not allowed on any hiking trails in Arches National Park (or any of Utah’s national parks). If you’re traveling with a dog, skip ahead to my Best Hikes in Moab Outside the Parks section for some fantastic dog-friendly alternatives.
These are the Arches hikes I would recommend to a friend, whether you’re visiting for the first time or looking to get beyond the park’s most popular stops.
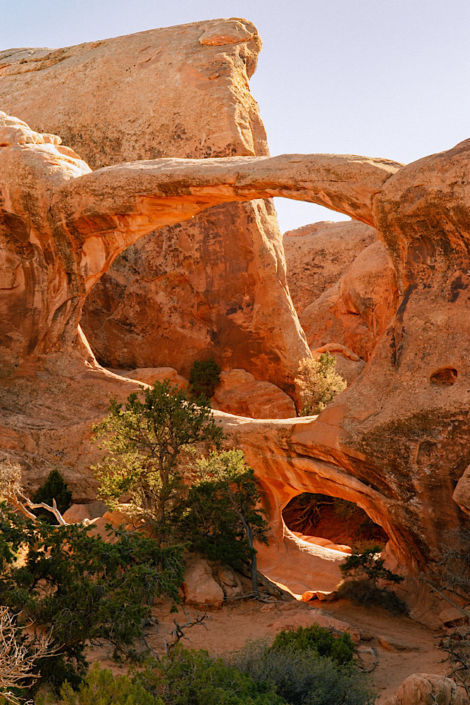
Double O Arch on the Devil’s Garden Loop
Devil’s Garden Loop
If you only have time for one big hike in Arches National Park, make it Devil’s Garden. This is the trail I would send an adventurous friend who wants a true Arches experience: more than seven incredible arches, fun sandstone scrambling, and constantly changing scenery.
Trail Snapshot
- Distance: 8.1 mi
- Elevation gain: 1,150 ft
- Difficulty: Hard
- Time: 4+ hrs
- Trail type: Loop
- Trip commitment: Half-day to full-day adventure. Plan extra time if you want to explore side trails and additional arches along the primitive loop.
- Devil’s Garden Trail Map
Why It’s One of the Best Hikes in Moab
Devil’s Garden is one of the few trails in Arches where the hike itself is the destination. While many Arches trails are short walks to a single viewpoint, this one feels like a true adventure. The primitive section takes you across sandstone fins, through narrow sections, and past arches that most visitors never see.
Emma’s Tips
Don’t take the spur trail to Dark Angel (it’s NOT an arch). It adds about a mile to the total distance, and I didn’t think it was worth it. The Dark Angel spire is cool, but you can see it from the main trail.
Double O Arch is my favorite one on the loop! If you don’t want to hike the whole loop, you can just hike clockwise on the trail to Double O and make it an out-and-back.
Planning Notes
Download a map before starting the trail. The AllTrails map has all the major arches and overlooks labeled so that you won’t miss any.
I hiked the trail counterclockwise (starting with the primitive trail). It was nice to start with the more challenging section and save the easier part of the trail for later in the day. The obstacles also made sense going counterclockwise.
If you only have one day in Arches, pair Devil’s Garden with the Windows area. You’ll see the best highlights of the park. I would not combine this with too many other hikes because the primitive loop deserves time.
Know Before You Go
- Start early, this is not a trail I would rush through
- I spent a full day stopping at each arch and enjoying the scenery
- Bring lots of water, electrolytes, and snacks
- Wear grippy shoes for the sandstone scrambles
Best For
- Hikers who want more than a viewpoint
- First-time visitors who want a signature Arches experience
- Fit adventurers ready for an all-day hike
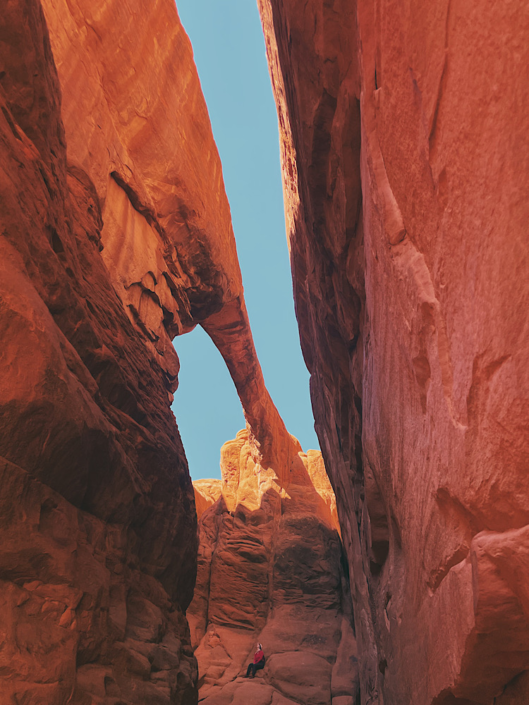
Surprise Arch in the Fiery Furnace
Fiery Furnace
The Fiery Furnace feels more like an obstacle course adventure than a traditional hike. If you enjoy scrambling, route finding, and squeezing through narrow sandstone passages, this is one of the most unique experiences in Arches National Park.
Trail Snapshot
- Distance: 2+ mi
- Elevation gain: 557 ft
- Difficulty: Hard
- Time: 2+ hrs
- Trail type: Loop
- Trip commitment: Half-day adventure that requires extra planning. You’ll need either a ranger-guided tour or a self-guided permit before entering.
- Fiery Furnace Trail Map
Why It’s One of the Best Hikes in Moab
Instead of following a clearly defined trail, you are weaving between towering sandstone fins, climbing over rocks, and figuring out your own route through a natural maze.
The permit requirement might make this hike seem like a hassle, but the extra planning is exactly what makes it special. I’ve hiked the Fiery Furnace twice, and both experiences felt completely different.
Because visitor numbers are limited, you get to experience a quieter side of Arches that feels much wilder and untouched than the park’s popular trails.
Emma’s Tips
I’ve opted for the self-guided hike both times. Before receiving your permit, you are required to watch a safety video at the Visitor Center.
My advice: watch the video the day before your hike. This lets you start whenever you want on hiking day instead of spending your morning waiting at the Visitor Center.
Also, don’t underestimate the route finding. The Fiery Furnace is not a hike where you simply follow a path from beginning to end. Part of the fun is exploring, but having a map removes unnecessary stress.
Planning Notes
Download an offline map before entering the Fiery Furnace. This is one trail where I consider a map essential.
The sandstone fins create a natural maze with plenty of dead ends and side routes. There are small brown arrows throughout the area to help guide hikers, but the AllTrails map has helped me more than once when I wasn’t sure which direction to go.
When I hiked the Fiery Furnace, my GPS tracked closer to 3.85 miles instead of the listed 2.1 miles. You can easily add mileage by exploring side passages and dead ends.
Know Before You Go
- You need a permit for a self-guided hike or a reservation for a ranger-guided tour.
- Permits are limited, so check availability before planning your Arches itinerary.
- Wear shoes with good grip. You will be climbing over sandstone and navigating uneven terrain.
- Bring plenty of water. The route is exposed and can feel much longer than the mileage suggests.
Best For
- Repeat Arches visitors
- Adventure seekers
- Hikers who enjoy scrambling and route finding
- People looking for a quieter experience
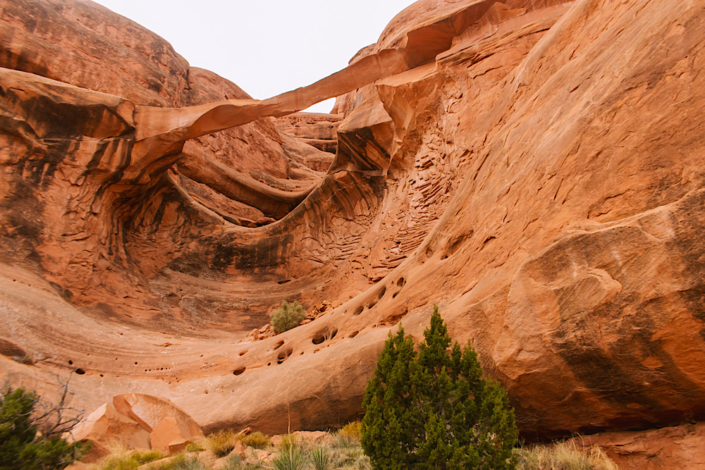
Looking up at Ring Arch
Ring Arch
The Ring Arch trail is a hidden gem that most visitors drive right past. It’s a short detour with a unique arch and almost no crowds.
Trail Snapshot
- Distance: 3 mi
- Elevation gain: 170 ft
- Difficulty: Moderate
- Time: 1-2 hrs
- Trail type: Out & Back
- Trip commitment: Shorter adventure that fits easily into a larger Arches day. Combine with nearby trails or viewpoints rather than making it the only stop.
- Ring Arch Trail Map
Why It’s One of the Best Hikes in Moab
Ring Arch is one of the best hikes in Moab for travelers who want to get away from Arches’ busiest trails. Unlike many of the park’s famous hikes, Ring Arch is not marked on the standard map you receive when entering the park, and far fewer visitors make the effort to find it.
The trail itself is relatively flat, making it a good option for hikers who want something quieter without committing to a long or strenuous adventure. The catch? You need to be comfortable navigating with a downloaded map because there are no signs guiding you along the route.
Emma’s Tips
There is no official parking lot for Ring Arch. You’ll need to park at a small pull-off near Courthouse Wash Bridge.
Park at this Google Maps pin. Save your parking location ahead of time so you aren’t searching for it when you arrive.
The AllTrails route splits in the middle. When I hiked this, I planned to go one direction and return the other way, but the second route was so washed out that I had to turn around.
My recommendation: take the left path at the split and return the same way.
Planning Notes
The biggest challenge with Ring Arch is not the hike itself, it’s finding the trailhead.
Before leaving:
- Save the parking location in Google Maps
- Download the offline trail map
- Know that there are no signs directing you to the arch
This is a great add-on hike if you are already exploring the northern part of Arches.
Know Before You Go
- This is not a signed or maintained trail like many Arches hikes
- Navigation skills (or a downloaded map) are important
- Do not rely on cell service in the park
- Bring water even though this is a shorter hike
- Leave extra time to find the parking area
Best For
- Hikers looking for a quieter Arches experience
- Confident hikers comfortable with navigation
- Repeat visitors who have already seen the famous viewpoints
- Travelers who enjoy finding lesser-known trails
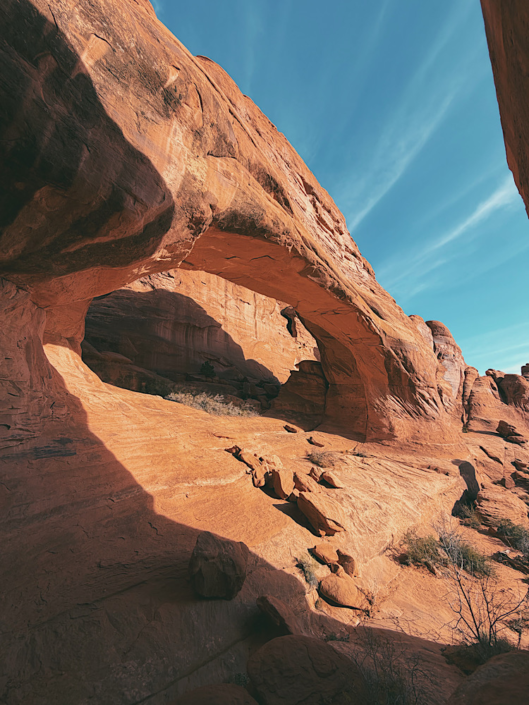
Side view of Tower Arch
Tower Arch
The Tower Arch trail is one of the most underrated hikes in Arches National Park. If you’re looking for a quieter adventure with a rewarding arch and don’t mind a little sand and scrambling, this trail is well worth the detour.
Trail Snapshot
- Distance: 2.6 mi
- Elevation gain: 629 ft
- Difficulty: Moderate
- Time: 2 hrs
- Trail type: Out & Back
- Trip commitment: Half-day adventure. The drive to the trailhead takes extra time, making this a great choice to combine with the less crowded northern section of Arches.
- Tower Arch Trail Map
Why It’s One of the Best Hikes in Moab
Directions to the Tower Arch trailhead. I was very surprised to find a pit toilet here.
Tower Arch is one of the few hikes in Arches where the journey feels just as rewarding as the destination. Between the quieter dirt road access, the climb over sandstone, the sandy valley, and the final approach to the arch, the scenery is constantly changing.
Unlike Delicate Arch or Landscape Arch, you’ll likely share the trail with far fewer people. If you enjoy getting away from the crowds without committing to a long hike, Tower Arch strikes a great balance between adventure and accessibility.
Emma’s Tips
If you’re comfortable scrambling, climb behind Tower Arch for one of the best perspectives of the formation. Most hikers stop in front of the arch, but the elevated viewpoint behind it was my favorite.
Also, don’t miss the smaller arch just before you reach Tower Arch. It’s easy to walk right past if you’re focused on the main attraction.
I also recommend letting loose and running down the big sand dune. 😉
Planning Notes
The drive to the trailhead is part of the adventure. The final stretch follows a well-maintained dirt road that most passenger vehicles can handle in dry conditions, but it naturally keeps visitor numbers lower than the park’s more accessible hikes.
There is also a separate 4WD road that reaches much closer to Tower Arch, significantly shortening the hike. Personally, I think the full trail is worth doing. You get to experience the changing landscapes instead of simply walking up to the arch.
If you’re already exploring this side of the park, consider pairing Tower Arch with Ring Arch or Skyline Arch for a quieter day away from Arches’ busiest attractions.
Know Before You Go
- Expect sections of deep sand
- You’ll need to scramble up and over a short rocky hill near the beginning of the hike
- Bring more water than you think you’ll need; the trail offers very little shade
- The dirt road to the trailhead is usually suitable for most vehicles in dry weather, but check current conditions after heavy rain
Best For
- Travelers looking to escape the crowds
- Repeat visitors to Arches
- Hikers who enjoy a little scrambling
- Families with older kids
- Anyone wanting a moderate hike with a big payoff
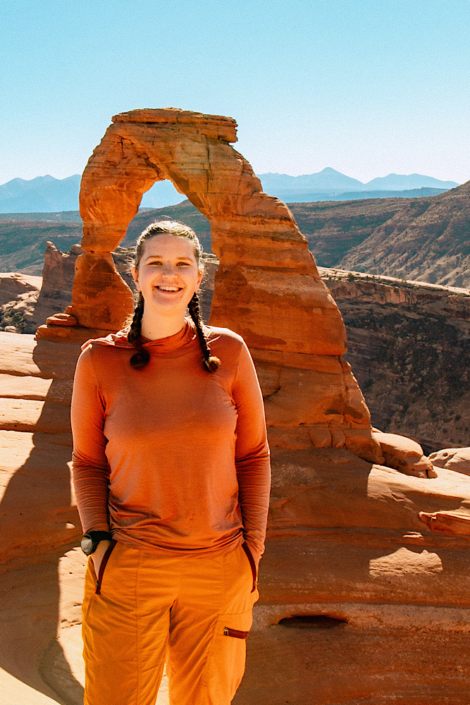
Standing in front of Delicate Arch
Delicate Arch
If you’re visiting Moab for the first time, you can’t skip Delicate Arch. Yes, it’s busy, but seeing Utah’s most iconic arch in person absolutely lives up to the hype.
Trail Snapshot
- Distance: 3.2 mi
- Elevation gain: 629 ft
- Difficulty: Moderate
- Time: 2 hrs
- Trail type: Out & Back
- Trip commitment: Half-day adventure. Easy to combine with other Arches highlights like Windows, Double Arch, or Balanced Rock.
- Delicate Arch Trail Map
Why It’s One of the Best Hikes in Moab
Yes, Delicate Arch is iconic, and it’s easy to understand why. I remember the first time I saw it in person. I couldn’t believe its scale. Photos make Delicate look so much smaller.
Walking up to the free-standing arch and seeing the framed La Sal Mountains in the background is a moment that makes you understand the hype.
Don’t rush back down the trail once you arrive. Find a place to sit, have a snack, and spend a few minutes soaking it all in. It’s one of those views you’ll remember long after your trip.
Emma’s Tips
Keep track of your belongings when you stop to sit around the bowl below Delicate Arch. I’ve seen more than one water bottle take off rolling down the slickrock, and retrieving it isn’t easy.
Stay well back from the edge of the bowl, especially if you’re hiking with kids. The sandstone slope is steep, and it’s worth giving yourself plenty of space while enjoying the view.
Planning Notes
Delicate Arch is best hiked early in the morning, especially during the warmer months. The trail has very little shade, and the slickrock can become brutally hot by midday.
Since this hike usually takes around two hours, it’s easy to combine with other nearby attractions like Balanced Rock, Double Arch, the Windows Section, or even part of Devil’s Garden if you’re planning a full day in Arches National Park.
I’ve hiked Delicate Arch and then to Double O Arch (out-and-back) on the Devil’s Garden Loop in the same day. It’s a solid itinerary for people who love hiking and want to see some of the best parts of Arches in limited time.
Know Before You Go
- There is very little shade along the trail
- Bring more water than you think you’ll need, especially in summer
- Expect crowds throughout the day, with sunrise and sunset being especially popular
- The final section crosses open slickrock with some exposure
- Restrooms and water are available at the trailhead.
Best For
- First-time visitors to Moab
- Anyone wanting to see Utah’s most iconic arch
- Sunrise or sunset photographers
- Families with older kids
- Visitors with one day in Arches National Park
If You Asked Me Which Arches Hike to Do…
…I’d ask you a few questions first.
Never been to Arches before: Delicate Arch is the one hike I’d insist you experience.
You’re an experienced hiker looking for the biggest adventure, I’d send you straight to Devil’s Garden Loop.
You’ve already visited Arches or want to avoid the busiest parts of the park, I’d point you toward Tower Arch or Ring Arch.
And if you enjoy scrambling and don’t mind planning ahead, Fiery Furnace is one of the most memorable hikes in the entire park.
➡️ For a more in-depth guide that includes hikes not on this list, read my Hiking in Arches National Park guide.
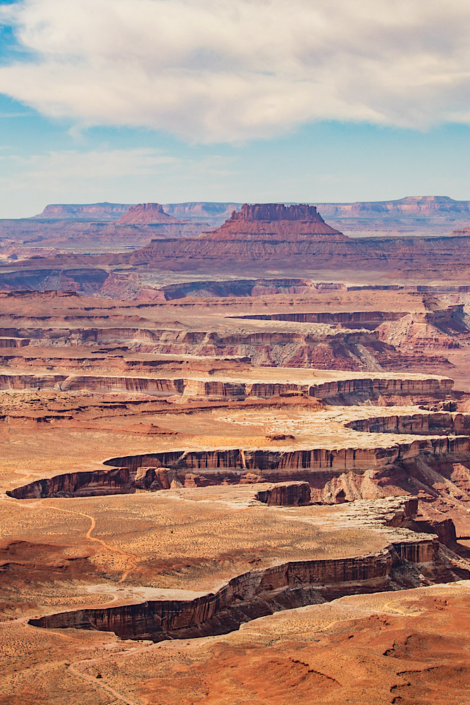
The Green River Overlook in Island in the Sky
Best Hikes in Canyonlands National Park
I honestly don’t know why Canyonlands National Park doesn’t get as much attention as Arches. Many of my favorite overlooks, hikes, and camping experiences near Moab are here.
Canyonlands has three distinct districts: Island in the Sky, the Needles, and the Maze. Island in the Sky is the closest district to Moab and the easiest to visit on a day trip. The Needles offers longer, more adventurous hikes, while the Maze is one of the most remote regions managed by the National Park Service.
Reaching the Maze takes serious planning (including rough roads and overnight camping), but I’d absolutely recommend it if you enjoy off-road travel and true backcountry adventures.
Island in the Sky
If it’s your first time visiting Canyonlands, this is where I’d start. The district is packed with dramatic overlooks, easy walks, and longer hikes that showcase just how massive the canyon system really is.
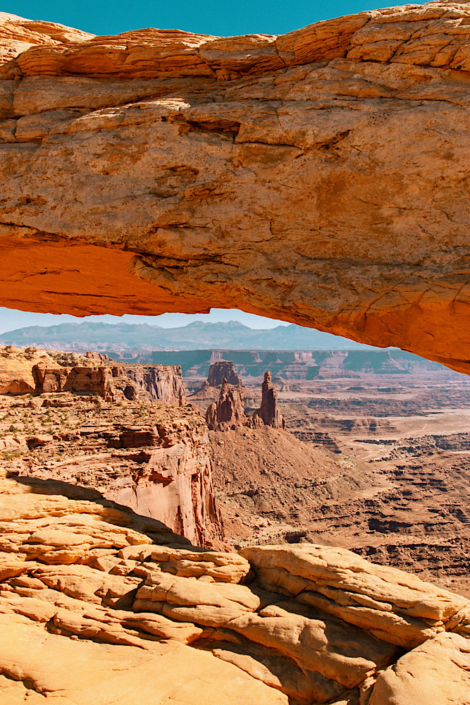
Looking under Mesa Arch
Mesa Arch
Hiking to Mesa Arch is one of the easiest trails with the biggest payoff in Moab. While it’s famous for sunrise photography, I think it’s worth visiting any time of day if you want a spectacular canyon view with minimal effort.
- Distance: 0.6 mi
- Elevation gain: 60 ft
- Difficulty: Easy
- Time: 30-45 min
- Trail type: Loop
- Trip commitment: Quick stop to half-day adventure. Easily combined with Grand View Point, White Rim Overlook, and other Island in the Sky viewpoints.
- Mesa Arch Trail Map
Why It’s One of the Best Hikes in Moab
Mesa Arch isn’t necessarily popular because of the arch itself, but how the view is framed through the arch. Crouch down and look underneath to see spires pushing up from the deep canyons and the La Sals outlined beyond.
It’s one of those rare places where a short walk delivers a view that feels much bigger than the effort required to reach it.
Emma’s Tips
Many people don’t realize this trail forms a loop. Start by hiking counterclockwise from the trailhead. After you’ve visited Mesa Arch, continue around instead of turning back.
The trail can be a little tricky to follow immediately after the arch, but a few cairns will guide you back to the main path.
I actually prefer returning this way because it’s much quieter, and you’ll pass interpretive signs identifying many of the desert plants along the trail.
Planning Notes
Parts of the trail can become surprisingly slippery when loose sand covers the slickrock. If balance is a concern, trekking poles can help, or hike clockwise to reach the arch while avoiding the steepest sandy descent.
Since Mesa Arch only takes about 30-45 minutes, I almost always pair it with Grand View Point, White Rim Overlook, or Green River Overlook for a fantastic half-day exploring Island in the Sky. The Green River Overlook is my absolute go-to in Island in the Sky. A paved path leads you to the edge of the overlook.
Know Before You Go
- Mesa Arch is famous for sunrise, but don’t feel like you have to wake up before dawn to enjoy it
- I’ve visited countless times around mid-morning and still thought the views were spectacular
- Sunrise is very busy, so visiting later can mean a much quieter experience
- Please don’t climb on top of the arch (seriously)
Best For
- First-time Canyonlands visitors
- Families
- Sunrise photographers
- Travelers short on time
- Anyone looking for a huge reward with very little hiking
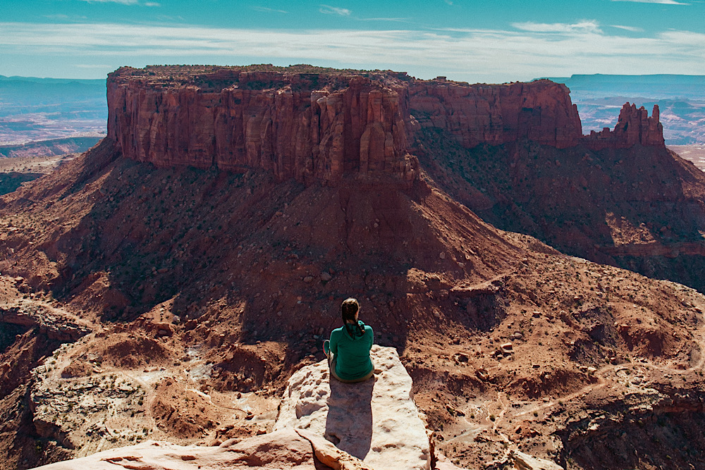
The best photo spot on the Grand View Point Trail
Grand View Point Trail
If you’re looking for maximum views with minimal effort, Grand View Point is hard to beat. Every step along the rim offers another incredible overlook.
- Distance: 1.9 mi
- Elevation gain: 200 ft
- Difficulty: Easy
- Time: 1 hr
- Trail type: Out & Back
- Trip commitment: Quick outing or part of an Island in the Sky highlights day. Pair with nearby overlooks and Mesa Arch.
- Grand View Point Trail Map
Why It’s One of the Best Hikes in Moab
Grand View Point proves that you don’t need a difficult hike to earn spectacular views. Nearly the entire trail follows the canyon rim, so the scenery starts almost immediately and only gets better as you go.
At the end of the trail, you’ll look out at the iconic island mesa. From this vantage point, you can truly appreciate how massive Canyonlands National Park is. Something hard to grasp from the overlooks alone.
Emma’s Tips
Scramble up to the top of the rocks at the end of the hike. That’s where you’ll find the best slab to sit on, jutting out perfectly for unbelievable photos. It reminds me of Pride Rock from The Lion King. Just be smart about it. Stay well back from the edge and never take unnecessary risks for a photo.
Another viewpoint that many people walk right past is immediately after descending the stairs from the parking lot. Walk onto the broad slickrock, look left over the canyon rim, and see if you can spot vehicles making their way along the White Rim Road far below.
Planning Notes
Grand View Point pairs perfectly with Mesa Arch and White Rim Overlook for an unforgettable day exploring Island in the Sky. If you’re short on time, Grand View Point gives you a fantastic introduction to Canyonlands without committing to a long hike.
Know Before You Go
- There is very little shade
- The trail follows cliff edges but stays wide and easy to follow
- Bring water, especially in summer
- Sunrise and sunset are beautiful, but the trail is stunning any time of day
Best For
- First-time Canyonlands visitors
- Families
- Anyone wanting huge views with minimal hiking
- Photographers
- Travelers short on time
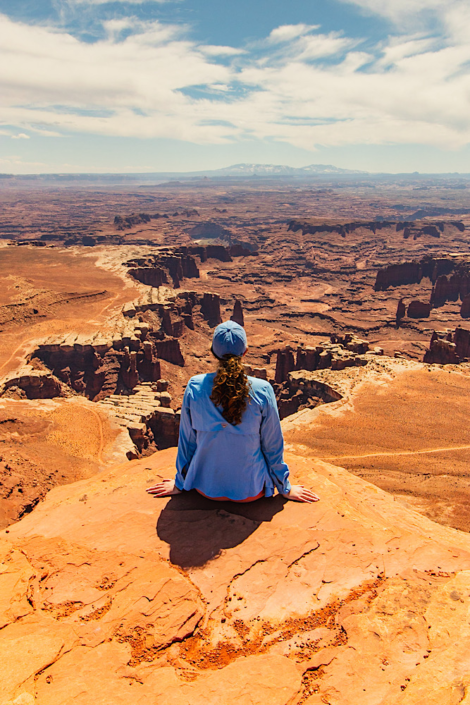
Deep canyon view from White Rim Overlook
White Rim Overlook
White Rim Overlook is short, easy, and surprisingly rewarding. If you want sweeping Canyonlands views without committing to a long hike, this is one of the best low-effort, high-reward trails in Island in the Sky.
- Distance: 1.8 mi
- Elevation gain: 173 ft
- Difficulty: Easy
- Time: 1 hr
- Trail type: Out & Back
- Trip commitment: Quick hike that fits well into an Island in the Sky day. A great alternative if Grand View Point feels too crowded.
- White Rim Overlook Trail Map
Why It’s One of the Best Hikes in Moab
White Rim Overlook is proof that you don’t always need a long hike to experience the scale of Canyonlands. The trail ends at a wide-open viewpoint overlooking the White Rim Road, Colorado River, and the endless layers of canyon country below.
Compared to the nearby Grand View Point, this trail often feels much quieter while still delivering the dramatic views people come to Canyonlands for.
Emma’s Tips
Stop at the picnic area in the parking lot for mountain views while you eat your lunch. I have literally taken photos from the parking lot that look like what most people expect to see at a designated viewpoint.
Planning Notes
White Rim Overlook pairs perfectly with Mesa Arch, Grand View Point, and the Green River Overlook for a manageable Island in the Sky adventure.
If Grand View Point feels too busy, this is one of the first trails I would choose instead. You get a similar sense of scale with fewer people and a more peaceful experience.
Know Before You Go
- There is little shade, so bring water even though this is a short hike
- The trail is mostly easy walking, but the final viewpoint has exposed cliff edges
- The viewpoint is best enjoyed slowly—bring a snack and take time to appreciate the scenery
- This is a great option when you want a quieter alternative to Canyonlands’ most famous overlooks
Best For
- First-time Canyonlands visitors
- Travelers short on time
- Families
- Hikers who want big views without a difficult trail
- Anyone looking for a quieter alternative to Grand View Point
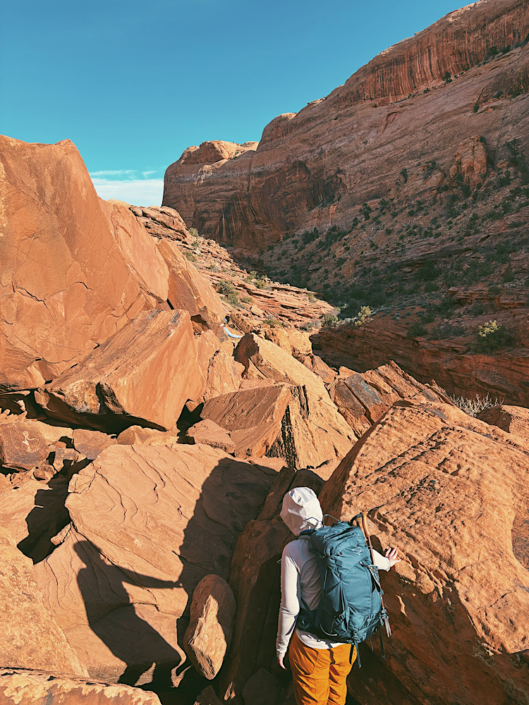
Scrambling up boulders on the Syncline Loop
Syncline Loop
The Syncline Loop is one of the most challenging hikes in the Moab area and a completely different experience from the easy overlooks that make up much of Island in the Sky. If you enjoy route finding, scrambling, and remote-feeling adventures, this is a rewarding full-day hike. It is not a trail I would recommend to everyone.
- Distance: 8.3 mi
- Elevation gain: 1,640 ft
- Difficulty: Hard
- Time: 5-6 hrs
- Trail type: Loop
- Trip commitment: Full-day adventure. This challenging loop deserves most of your day and should not be squeezed between other stops.
- Syncline Loop Trail Map
Why It’s One of the Best Hikes in Moab
Syncline Loop is not your typical Island in the Sky hike. While many Canyonlands trails lead to a viewpoint, this trail is about the adventure itself.
I love that there is a warning sign just one mile into the hike. It immediately tells you that this is not going to be a casual walk around Upheaval Dome. The route includes steep sections, scrambling, and challenging navigation, especially later in the loop.
Emma’s Tips
Be careful not to accidentally start at the wrong trail.
Syncline Loop does NOT include the Upheaval Dome Overlooks. When I hiked this, we accidentally followed the overlook trail first, assuming it was part of the loop.
After reaching the second overlook and realizing we needed to backtrack to find the actual Syncline Loop trailhead, we lost valuable time. I hiked this in February when daylight hours were limited.
If you want to include the Upheaval Dome Overlooks or the spur trail to the crater at the bottom, plan extra time.
Also, download your map before starting. The later sections of the loop require route finding, and having a map makes the experience much less stressful.
Planning Notes
Treat this as a full-day adventure.
Although the mileage may not seem extreme, the terrain makes this hike much slower than a typical 8-mile trail. When I hiked Syncline Loop, our total elapsed time was about 6.5 hours because we included both overlooks and spent time navigating.
Do not plan this as a quick stop between other Canyonlands viewpoints. Although I definitely recommend the Upheaval Dome Overlooks as a quick stop if you wish.
Know Before You Go
- This is one of the more physically demanding hikes in Island in the Sky
- Route-finding skills are important
- Expect scrambling and uneven terrain
- Bring plenty of water and food
- Do not rely on cell service
- Download your map before leaving town
- This trail is not ideal for hikers looking for a quick viewpoint
Best For
- Experienced hikers
- People who enjoy route-finding
- Hikers who prefer quiet trails over famous viewpoints
- Visitors looking for a challenging Canyonlands experience
The Needles
You’ll find that The Needles District of Canyonlands feels like a completely different park from Island in the Sky. Instead of sweeping overlooks, you’ll spend your time weaving between towering sandstone spires, narrow passages, and remote desert landscapes.
The biggest thing to know: The Needles is not a quick stop from Moab. The drive takes significantly longer than reaching Island in the Sky, and these hikes deserve more than a rushed day. It’s a 1 hour 45 minute drive from Moab to the Elephant Hill Trailhead in The Needles.
If you have the time, I highly recommend camping nearby. Either inside Canyonlands or at the privately owned campground right outside the park entrance. Waking up closer to the trailhead lets you experience these hikes without spending hours in the car before and after.
For ambitious hikers, Chesler Park and Druid Arch can even be combined into a 22+ mile adventure. Trail runners and experienced hikers looking for a massive day could make this an unforgettable challenge.
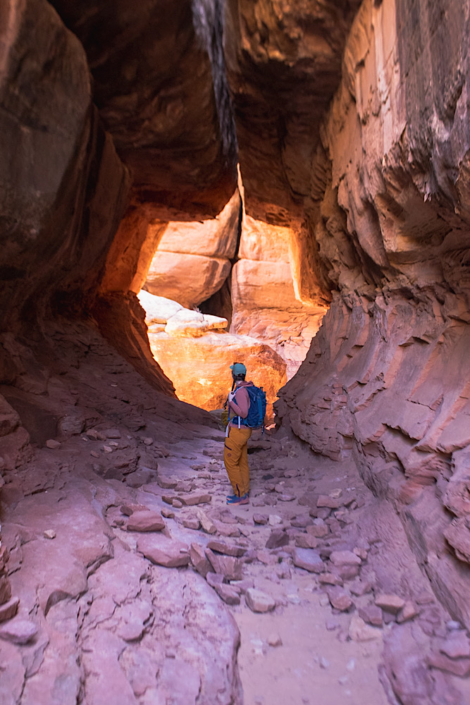
My favorite area of Chesler Park
Chesler Park Loop
The combination of towering sandstone spires, open desert meadows, and narrow passages makes Chesler Park feel like a true adventure.
- Distance: 10.4 mi
- Elevation gain: 1,706 ft
- Difficulty: Hard
- Time: 6-7 hrs
- Trail type: Loop
- Trip commitment: Full-day adventure or overnight backpacking trip. The remote location makes this best combined with other Needles highlights and camping nearby.
- Chesler Park Loop Trail Map
Why It’s One of the Best Hikes in Moab
The diversity is what makes Chesler Park special. In one hike, you’ll move through dramatically different landscapes. From open views surrounded by sandstone needles to natural rooms carved out of the rock.
The slot-like sections were one of my favorite parts of the trail. The way sunlight filters into the cracks creates incredible photography opportunities and makes you want to slow down and explore every corner.
Emma’s Tips
The best lighting in the narrow sections is around midday when the sun shines directly down into the cracks. This is one hike where I would not rush to start at sunrise.
Also, don’t skip the bathroom stop halfway through the trail! The route crosses a road with a pit toilet, which feels hilariously unexpected in the middle of such a remote hike.
Planning Notes
Camp nearby if you can. The Needles is a long drive from Moab, and adding several hours of driving to an already demanding hike makes for a very long day.
This is also a great trail to combine with Druid Arch if you’re looking for a big adventure. Experienced hikers can create a much longer day by connecting both routes.
Know Before You Go
- Download your map before starting
- There are many trail intersections, and it can be easy to take the wrong route
- Carry plenty of water and food
- Give yourself more time than the mileage suggests
Best For
- Experienced hikers
- Photographers
- Visitors who enjoy exploring rather than checking off viewpoints
- People staying overnight in the Needles area
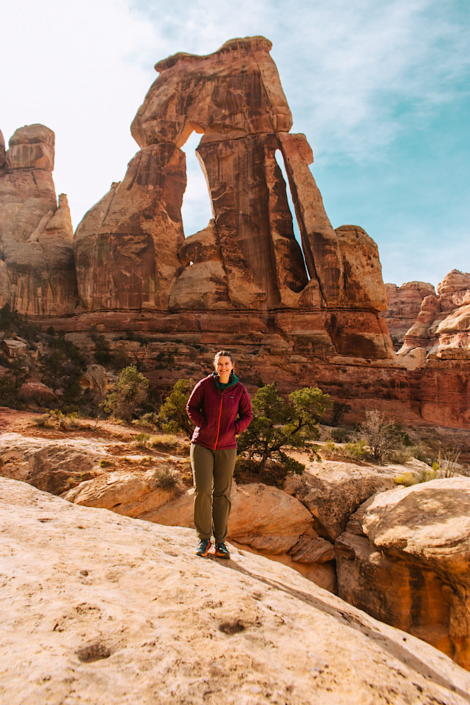
Viewpoint you scramble to at Druid Arch
Druid Arch
Druid Arch is one of the most impressive formations in Canyonlands, but you have to earn the view. The long approach, sandy sections, and final scramble keep crowds low and make reaching the arch feel like a true accomplishment.
- Distance: 10 mi
- Elevation gain: 1,450 ft
- Difficulty: Hard
- Time: 5-6 hr
- Trail type: Out & Back
- Trip commitment: Full-day adventure. The long drive to the Needles District plus the demanding hike makes this a dedicated day.
- Druid Arch Trail Map
Why It’s One of the Best Hikes in Moab
Druid Arch is one of those places where the journey is part of the reward. The trail takes you deep into the Needles District, through dramatic desert scenery, before ending at one of the most unique (and massive) arches in Utah.
Unlike some arches you can see shortly after leaving the trailhead, Druid Arch feels like an expedition. By the time you reach the final climb, you’ll understand why this destination feels so special.
Emma’s Tips
Save some energy for the end! I didn’t realize there was a scramble to reach Druid Arch, and it was more challenging than I expected.
Also, remember that mileage doesn’t always equal difficulty. Much of this trail crosses sand, which makes every step more tiring than hiking on firm ground.
Planning Notes
Like Chesler Park, I strongly recommend camping nearby if you are hiking Druid Arch.
The drive from Moab plus a 10-mile hard hike makes this a very long day if done as a day trip. Staying nearby lets you start early and enjoy the trail without feeling rushed.
Know Before You Go
- Download a map before hiking
- There are multiple junctions where it is easy to accidentally head the wrong direction
- Expect sand, scrambling, and uneven terrain
- Bring plenty of water and snacks
- Do not underestimate the final scramble to the arch
Best For
- Experienced hikers
- Adventurers looking for a destination hike
- Visitors staying overnight near the Needles
- People who enjoy earning their views
The Maze
The Maze is where Canyonlands earns its reputation as one of the most remote places you can drive to in the lower 48.
Unlike Island in the Sky and the Needles, the Maze is not a casual day trip from Moab. Reaching the district requires serious planning, high-clearance/4WD roads, and overnight camping permits. If you’re interested in exploring this area, I recommend reading my complete Maze District planning guide before you go.
That said, not every Maze-area hike requires the same level of commitment. Horseshoe Canyon offers one of the most accessible ways to experience the area’s incredible pictographs, while deeper Maze adventures like Harvest Scene require a true backcountry itinerary.
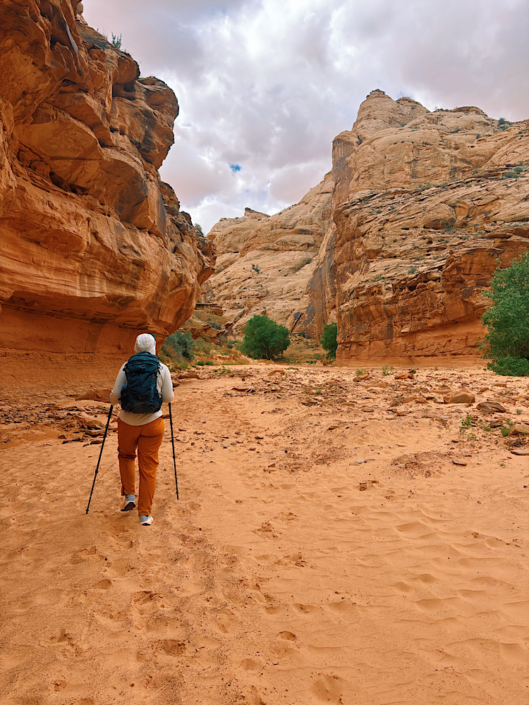
Hiking in the wash in Horseshoe Canyon
Horseshoe Canyon
The long drive is absolutely worth it for the chance to see some of the most significant Barrier Canyon Style pictographs in the world, especially the incredible Great Gallery.
- Distance: 8 mi
- Elevation gain: 875 ft
- Difficulty: Moderate
- Time: 4-5 hrs
- Trail type: Out & Back
- Trip commitment: Half-day to full-day adventure. The drive and remote location make it worth combining with other western Canyonlands stops.
- Horseshoe Canyon Trail Map
Why It’s One of the Best Hikes in Moab
Horseshoe Canyon is unlike any other hike on this list. Instead of towering arches or canyon overlooks, the destination is thousands of years of human history preserved on canyon walls.
The Great Gallery is the main attraction, and seeing these massive pictographs in person is one of my favorite experiences in Utah. The size, detail, and mystery behind the artwork make this hike unforgettable.
Emma’s Tips
If a ranger is at the trailhead or in the canyon, take advantage of it! Ask questions and learn about the history of the area. It completely changes the experience.
Bring binoculars if you have them. Some of the details in the pictographs are easier to appreciate with a closer view.
Also, keep your eyes open near the beginning of the trail for a dinosaur track.
And please leave everything you find exactly where it is. Arrowheads and artifacts belong in the landscape, not in someone’s collection.
Planning Notes
Horseshoe Canyon is over 2.5 hours from Moab, so I would not treat this as a quick add-on.
If you are making the drive, consider camping nearby on BLM land the night before. This gives you a much earlier start and lets you enjoy the canyon without spending five hours of your day just driving.
I’d also recommend hiking nearby Colonnade Arch if you’re going to drive out here. In my opinion, it’s more impressive most formations in Arches National Park.
➡️ For more details about getting there, camping, and planning this remote adventure, see my full Horseshoe Canyon guide.
Know Before You Go
- You can reach the trailhead without true 4WD, but higher clearance and good tires are recommended
- Bring plenty of water as the canyon has little shade
- Download your map before leaving
- The return hike is uphill, so save energy for the climb out
Best For
- History lovers
- Photographers
- Adventurous travelers willing to drive farther
- Visitors looking for something beyond arches and viewpoints
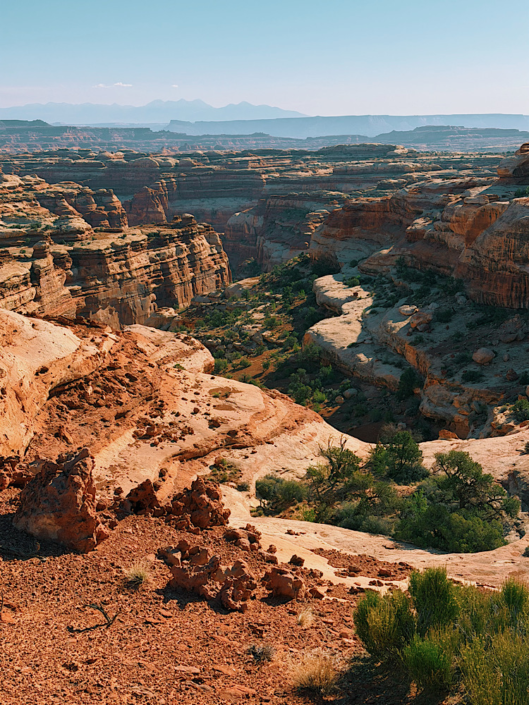
View from Pete’s Mesa
Harvest Scene via Pete’s Mesa
Harvest Scene is the kind of hike that makes you understand why people fall in love with the Maze. The scenery is incredible, the pictographs are fascinating, and the remote location means you may have the entire landscape to yourself.
- Distance: 8.7 mi
- Elevation gain: 1,250 ft
- Difficulty: Moderate
- Time: 4-5 hrs
- Trail type: Out & Back
- Trip commitment: Multi-day adventure. The remote location makes this best combined with other Maze hikes and nearby camping rather than a day trip from Moab.
- Harvest Scene Trail Map
Why It’s One of the Best Hikes in Moab
The Harvest Scene hike feels like a true Maze adventure. We didn’t see another person the entire time.
The trail combines dramatic desert scenery with ancient pictographs, making the journey just as rewarding as the destination. This hike is about experiencing the solitude and wildness of Canyonlands.
Emma’s Tips
Don’t skip the bonus stop at Magnus Arch if you have the time. It adds about a mile but makes the adventure even more rewarding.
Also, don’t assume the canyon provides constant shade. The canyon walls are tall, but the canyon itself is wide and exposed in many sections.
Planning Notes
This is not a standalone Moab day trip. Plan this as part of a larger Maze itinerary with nearby camping.
Download your map before leaving. In a place this remote, navigation is part of the adventure.
Also, secure your campsite before heading out for the day. Critters in the Maze are excellent at finding unattended food, and you do not want to return to a destroyed camp.
➡️ For a full breakdown of planning a Maze adventure, check out my Maze District 4-day itinerary and planning guide.
Know Before You Go
- The trail starts with a descent and ends with a climb back out
- Bring more water than you think you need
- Expect solitude — this is part of the appeal
- Navigation skills are important
Best For
- Experienced hikers
- Backpackers
- Travelers seeking solitude
- People who enjoy remote desert adventures
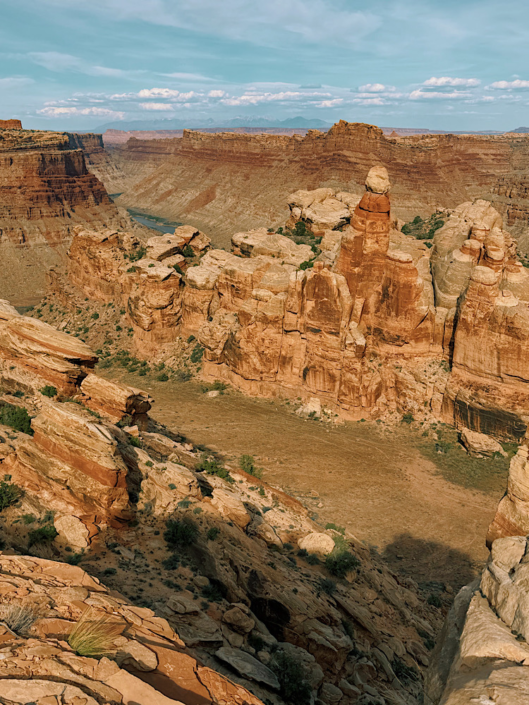
Can you see the Colorado River?
Granary Trail
Granary Trail is a short but rewarding hike that packs in ancient history, canyon views, and a taste of the Maze experience without committing to a full-day adventure.
- Distance: 2.5 mi
- Elevation gain: 450 ft
- Difficulty: Moderate
- Time: 1-2 hrs
- Trail type: Loop
- Trip commitment: Short hike within a bigger Maze adventure. Best experienced as part of a multi-day Canyonlands itinerary rather than a standalone trip.
- Granary Trail Map (From Spanish Bottom)
Why It’s One of the Best Hikes in Moab
This trail is proof that the Maze isn’t only about extreme adventures. In a relatively short hike, you’ll see ancient granaries, views of the Colorado River, and narrow sections of canyon that make the landscape feel much bigger than the mileage suggests.
Emma’s Tips
If you’re able to reserve a campsite nearby, I would. There is much more to explore in this area, and staying overnight gives you time to slow down.
You can opt to hike down toward the Colorado River for a swim, but be warned. The route drops roughly 1,000 feet, which means you’ll have a big climb back up.
Planning Notes
This is best experienced as part of a larger Maze itinerary rather than as a standalone trip from Moab.
If you are already planning a Maze adventure, this is a great shorter hike to add between bigger objectives.
Know Before You Go
- Download your map before hiking
- Bring plenty of water
- Plan for a steep climb if you visit the river
- Respect archaeological sites and leave everything where you find it
Best For
- History lovers
- Visitors wanting a shorter Maze experience
- Travelers who want archaeology without a full-day hike
Best Hikes in Moab Outside the Parks
One of my favorite things about Moab is that some of the area’s best hikes aren’t inside the national parks at all. These trails are dog-friendly, don’t require a park reservation or entrance fee, and are all easy day trips from downtown Moab.
If you’re traveling with a dog or want to escape the busiest trails in Arches and Canyonlands, start here.
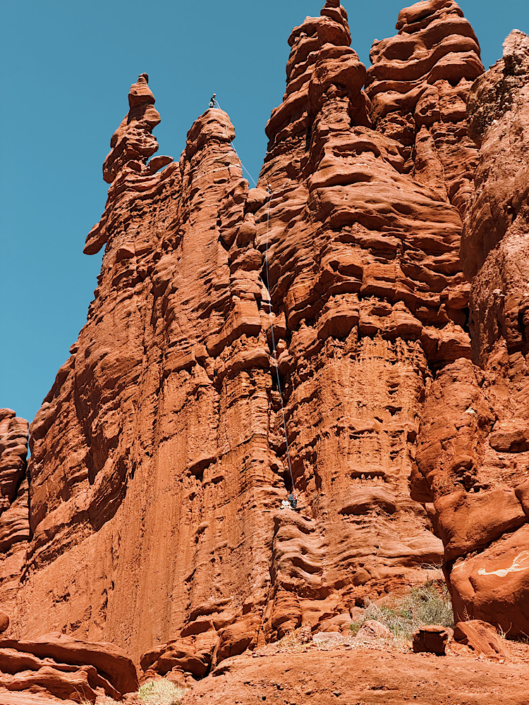
Spot the climbers on the Towers
Fisher Towers Trail
Fisher Towers is one of the most unique hikes near Moab. Towering red rock spires, fun scrambling, and a rewarding viewpoint make this a great dog-friendly adventure.
- Distance: 4.6 mi
- Elevation gain: 1,200 ft
- Difficulty: Moderate
- Time: 2-3 hrs
- Trail type: Out & Back
- Trip commitment: Half-day adventure. Easy to add to a Moab itinerary, especially if you want a dog-friendly alternative to the national parks.
- Fisher Towers Trail Map
Why It’s One of the Best Hikes in Moab
The Fisher Towers don’t look like anything else around Moab. Instead of wide-open slickrock and arches, you’ll hike beneath towering sandstone spires that almost look like giant castles.
The scenery changes constantly, and the final viewpoint overlooking Titan (the largest Fisher Tower) and Onion Creek is worth every step. Even though it’s outside the national parks, this is one of the most memorable hikes in the area.
Emma’s Tips
There is a ladder about halfway through the trail. Large dogs can scramble around it using a bypass, while smaller dogs can usually be carried down and up the ladder.
If you’re hiking with your dog, bring extra water. There is very little shade along the trail.
Planning Notes
Since hiking Fisher Towers only takes a few hours, it’s easy to combine with a scenic drive along Highway 128 or an afternoon exploring downtown Moab. Or even another nearby hike if you’re up for it!
➡️ For photos of the ladder and exactly what to expect, check out my full Fisher Towers Trail guide.
Know Before You Go
- Dogs are allowed on leash
- There is shade in the morning
- Expect a short ladder and a few easy scrambling sections
- Bring plenty of water
Best For
- Dog owners
- Families with adventurous kids
- Photographers
- Visitors looking to escape the crowds
- First-time visitors wanting something different than Arches
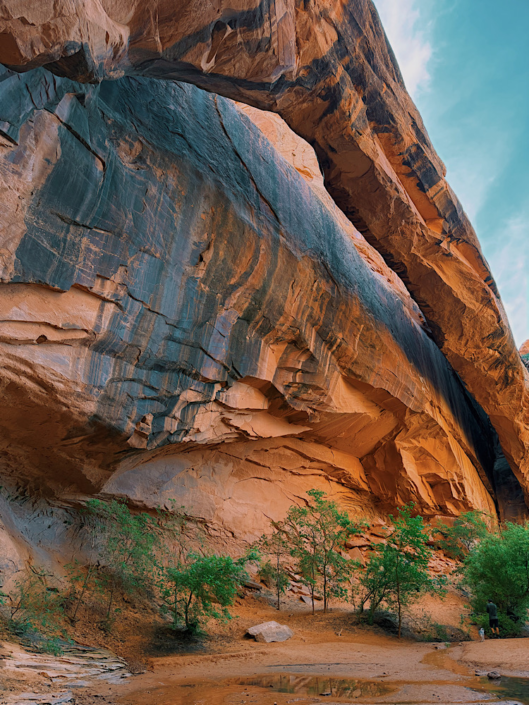
Morning Glory Natural Bridge
Grandstaff Canyon Trail
The Grandstaff Canyon trail is one of the best warm-weather hikes near Moab. Creek crossings, canyon shade, and Morning Glory Natural Bridge make it feel completely different from the surrounding desert.
- Distance: 4.4 mi
- Elevation gain: 400 ft
- Difficulty: Moderate
- Time: 2 hrs
- Trail type: Out & Back
- Trip commitment: Half-day adventure. A great warm-weather option that pairs well with other Moab activities and doesn’t require a park pass.
- Grandstaff Canyon Trail Map
Why It’s One of the Best Hikes in Moab
Grandstaff Canyon surprises almost everyone. Instead of hiking across exposed slickrock, you’ll follow a creek through a canyon before arriving at Morning Glory Natural Bridge.
There is one section of very light scrambling, and I’ve seen many families on this trail.
Emma’s Tips
I actually recommend hiking this trail in the early evening during summer.
It sounds backward, but by then much of the canyon is shaded, and the temperatures are more comfortable. You’ll likely encounter fewer people than during the busy morning hours.
Your feet might get wet, as there are several creek crossings along the way. I managed to keep my feet dry by bounding from rock to rock across the water.
Planning Notes
This is one of my favorite hikes to recommend when every other trail will bake you to a crisp.
Since it only takes a couple of hours, it’s easy to pair with time in downtown Moab or another shorter hike nearby.
➡️ For creek crossing tips, parking information, and the best time of day to hike, read my complete Grandstaff Canyon Trail guide.
Know Before You Go
- Dogs on-leash are welcome
- Expect multiple creek crossings
- The trail includes sections of sand and light scrambling
- Wear shoes you don’t mind getting wet
Best For
- Summer hiking
- Dog owners
- Families
- Beginner to intermediate hikers
- Anyone wanting shade and water
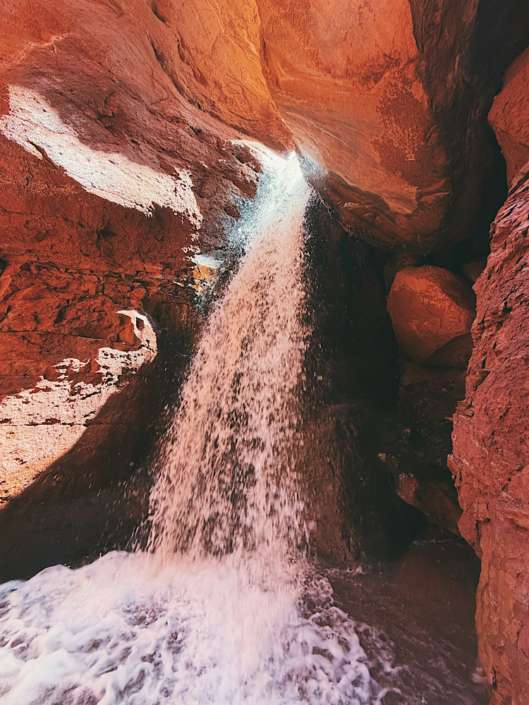
Hidden waterfall in Mary Jane Canyon
Mary Jane Slot Canyon (Professor Creek)
Find a true desert adventure in Mary Jane Slot Canyon. Water crossings, a beautiful slot canyon, and a hidden waterfall make this one of the most exciting hikes near Moab.
- Distance: 8.2 mi
- Elevation gain: 600 ft
- Difficulty: Moderate
- Time: 4-5 hr
- Trail type: Out & Back
- Trip commitment: Half-day adventure. Allow extra time to explore the canyon, cross water, and enjoy the scenery rather than rushing through.
- Mary Jane Slot Canyon Trail Map
Why It’s One of the Best Hikes in Moab
This trail has a little bit of everything. You’ll cross Professor Creek repeatedly, wander through a beautiful slot canyon, and eventually reach a waterfall hidden deep within the canyon.
It’s one of those hikes where getting there is just as much fun as reaching the destination.
Emma’s Tips
Wear trail runners. Your feet are going to get wet (eventually just hiking in straight water) and trail runners dry much faster than waterproof hiking boots.
Also, download the trail map before you go. The route follows the creek for much of the hike, and it isn’t always obvious at the very start. There is one confusing turn.
Planning Notes
Don’t rush this hike. The creek crossings and slot canyon wandering naturally slow your pace, so allow extra time to enjoy the adventure instead of focusing on your hiking speed.
➡️ If you want a full breakdown of the water crossings, what to wear, and what to expect at the waterfall, check out my complete Mary Jane Slot Canyon guide.
Know Before You Go
- Dogs are allowed on-leash
- Expect frequent water crossings
- Your feet will get wet
- Download the trail map before hiking
- Bring extra socks for the drive back to Moab
Best For
- Adventure seekers
- Dog owners
- Photographers
- People who enjoy the water
- Anyone looking for a unique desert hike
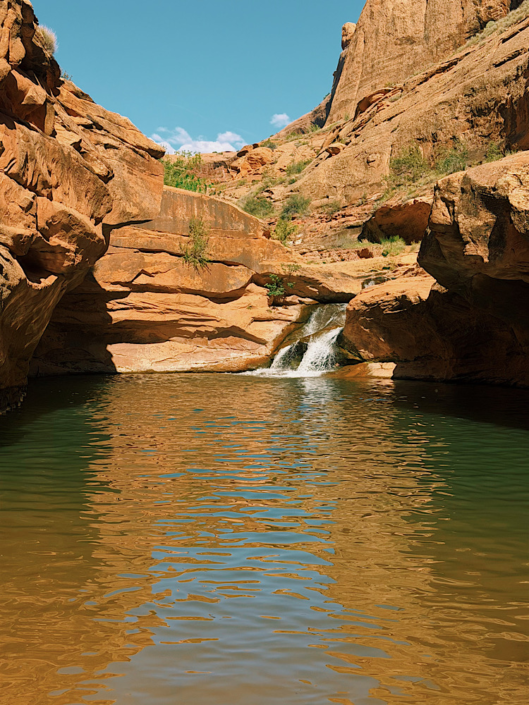
Pool under the Mill Creek waterfall
Mill Creek Trail
When you want to escape the desert heat, Mill Creek is the perfect trail. It’s a short, dog-friendly walk that ends at a popular swimming hole.
- Distance: 1.8 mi
- Elevation gain: 170 ft
- Difficulty: Easy
- Time: 45 min
- Trail type: Out & Back
- Trip commitment: Short adventure that works well as a flexible add-on. Great for cooling off after a longer desert day.
- Mill Creek Trail Map
Why It’s One of the Best Hikes in Moab
Think of this as a hike to a swimming hole, not a hike to a dramatic waterfall.
If you’re expecting a peaceful waterfall tucked away in the desert, you might be surprised. During the warmer months, most people come here to swim, relax on the rocks, and cool off in the water.
If you visit during spring, fall, or on a cooler day, you’ll likely enjoy a much quieter experience.
Emma’s Tips
Your feet are getting wet on this hike…actually, your calves are getting wet.
Wear shoes you don’t mind soaking and bring a towel if you’re visiting in warm weather. Chacos worked perfectly for this hike.
I also didn’t realize how much of a swimming destination this was. Most people I saw weren’t hiking. They were spending the afternoon in the water.
Planning Notes
Mill Creek is only minutes from downtown Moab, making it one of the easiest hikes to squeeze into your itinerary.
I especially like it after a long morning hike or on a hot afternoon when you want to cool off instead of tackling another big adventure.
Know Before You Go
- Dogs are allowed on-leash
- Expect several water crossings
- Water levels vary throughout the year
- Bring a towel if you plan to swim
- Wear shoes with good grip for slippery rocks
Best For
- Families
- Dog owners
- Hot summer days
- Travelers short on time
- Anyone looking for a relaxing afternoon
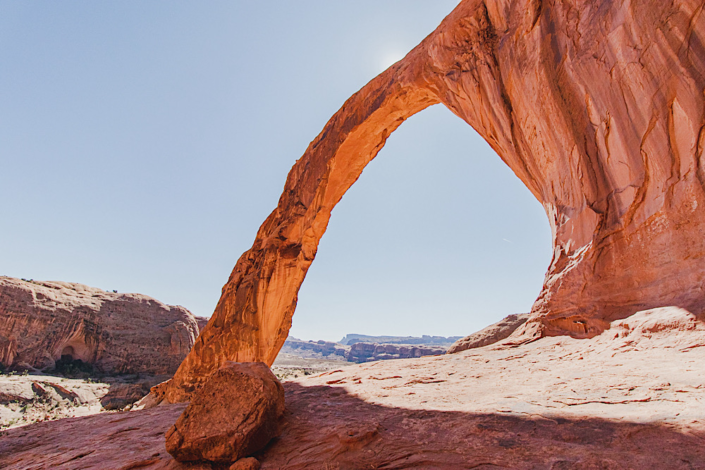
View through Corona Arch
Corona Arch
The Corona Arch trail is one of the best arch hikes near Moab without entering a national park. The fun obstacles along the trail and the enormous arch at the end make it an easy recommendation for first-time visitors.
- Distance: 2.5 mi
- Elevation gain: 450 ft
- Difficulty: Moderate
- Time: 2 hrs
- Trail type: Out & Back
- Trip commitment: Half-day adventure. One of the best standalone Moab hikes outside the parks and easy to combine with nearby attractions.
- Corona Arch Trail Map
Why It’s One of the Best Hikes in Moab
Corona Arch delivers one of the biggest payoffs for the effort required.
The trail itself is fun, with slickrock sections, a short ladder, and cables that add just enough adventure to keep things interesting without making the hike feel intimidating.
When you finally reach Corona Arch, it’s hard not to stop for a while. Standing beneath one of the largest arches near Moab really puts its size into perspective.
Emma’s Tips
Don’t let the ladder scare you away.
It’s short, sturdy, and most hikers have no trouble getting past it. There are also cables installed to help on a couple of steeper slickrock sections.
Planning Notes
One of the biggest advantages of Corona Arch is that it doesn’t require a national park entrance fee or timed reservation.
It’s easy to combine with a scenic drive along Potash Road or other nearby hikes outside Arches National Park.
Know Before You Go
- Dogs are allowed on-leash
- There is very little shade
- Bring plenty of water
- Expect one ladder and a few cable-assisted sections
- Start early during summer to avoid the heat
Best For
- First-time Moab visitors
- Families with older kids
- Dog owners
- Photographers
- Anyone wanting a spectacular arch without entering Arches National Park
Still Not Sure Which of the Best Hikes in Moab to Choose?
Here’s what I’d recommend if you asked me to help plan your trip:
If you only have one day in Moab…
Spend it in Arches National Park. Hike Devil’s Garden Loop if you’re up for a challenge or Delicate Arch if it’s your first visit. Finish the day exploring the Windows Section and Balanced Rock.
If you’re traveling with a dog…
Skip the national parks and head to Fisher Towers, Grandstaff Canyon, or Mary Jane Slot Canyon. They’re all dog-friendly, don’t require a park entrance fee, and offer completely different experiences.
If you’re visiting during summer…
Choose Grandstaff Canyon for its creek crossings and afternoon shade, or Mill Creek if your goal is simply to cool off with a swim after a short hike. Mary Jane Slot Canyon also has Professor Creek and some shade during the day.
If you want to avoid the crowds…
I’d head to Tower Arch, Ring Arch, White Rim Overlook, or almost anywhere in the Needles District. Venture into the Maze and you’ll likely have entire trails to yourself.
If you want the biggest adventure…
Choose Fiery Furnace, Syncline Loop, Druid Arch, or the Harvest Scene. These hikes require more planning and effort, but they’re the ones I still think about long after the trip is over.
No matter which trail you choose, I hope you leave Moab already planning your next trip. I’ve been coming back for years and still have new places on my list. That’s the best thing about hiking around Moab. There’s always another adventure waiting just down the road.
📌 Pin this image on Pinterest to save this post for reference.
FAQs About The Best Hikes in Moab
What is the best time of year to hike in Moab?
Spring and fall are the best seasons for hiking in Moab because temperatures are more comfortable. Summer can be extremely hot, so start early, carry extra water, and choose trails with shade or water when possible.
What should I bring hiking in Moab?
Bring plenty of water, electrolytes, sun protection, snacks, offline maps, and shoes with good traction. Many Moab trails involve exposed slickrock, sand, scrambling, and little shade, so be prepared for desert conditions.
How many days do you need to hike in Moab?
You can see some highlights in 2-3 days, but I recommend spending 4-5 days to experience the best hikes in Moab without rushing. This gives you time for Arches, Canyonlands, and trails outside the parks.
Are dogs allowed on Moab hiking trails?
Dogs are not allowed on hiking trails in Arches National Park or Canyonlands National Park. For dog-friendly hikes, check out trails outside the parks like Fisher Towers, Grandstaff Canyon, Mary Jane Slot Canyon, Mill Creek, and Corona Arch.
Do you need reservations or permits to hike in Moab?
Some Moab hikes require permits or reservations, including Fiery Furnace in Arches National Park and overnight backcountry adventures in Canyonlands. Most day hikes do not require additional permits. You might need timed entry for Arches during certain parts of the year. Check the National Park Service website for the most up to date information.
What are the best hikes in Moab?
The best hikes in Moab depend on what you’re looking for. First-time visitors should prioritize Delicate Arch, Devil’s Garden, Mesa Arch, and Grand View Point. For fewer crowds, consider Tower Arch, White Rim Overlook, or hikes in the Needles District.